Loom – A review

I really like making tutorial videos. I don’t do it as much now that I’m not teaching but whenever there is an opportunity I like to jump at it. You know what? I’m not bad. I try to make it as professional as possible. I use Screenflow, which allows me to capture and edit my recordings, then I like to add music if necessary and if it requires a voice over I always use an external mic to capture my voice. Check out my channel on YouTube.
OK enough self promotion. We are here to talk about Loom. This is an extension that you can install in the Chrome Browser and it will let you make screencasts of your very own. Let’s find out if it’s worth your time or not.
Installing
First things first, you have to use the Chrome browser for this thing to work. If you use Safari, Edge, Explorer, Opera, Firefox or any other browser it simply will not work. So make sure that Chrome is fired up and ready to go (you can download it for free). Then you can find the Loom extension in two places. You can find it from their website or you can go to the Chrome Webstore.
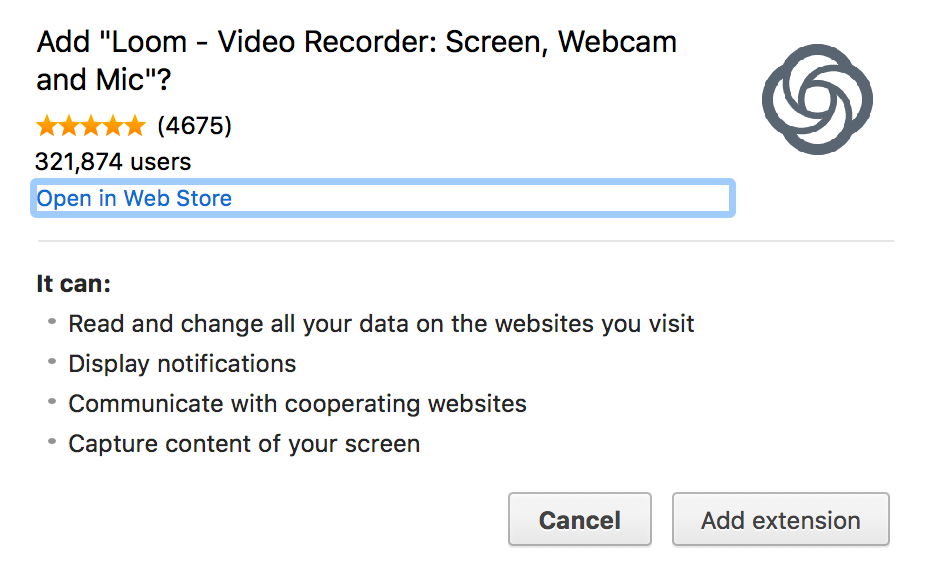
When you install it you get this pop up.
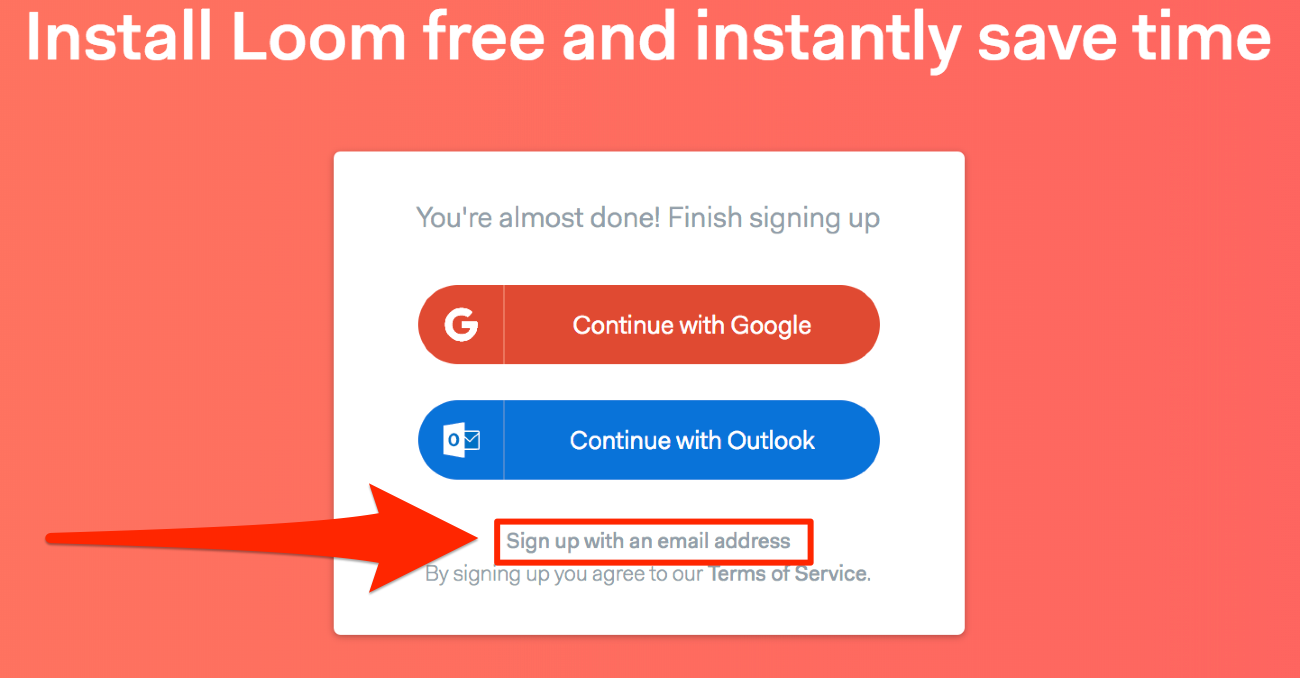
It then asks how you would like to log in. You can sign in with your Google account, your Microsoft account or you can even chose to sign up with an email but that item is teeny tiny at the bottom, but hey it’s there. My school uses Google Apps for Education so I’m going to sign in with my Google account.
Now it wants to know how I am going to use Loom.
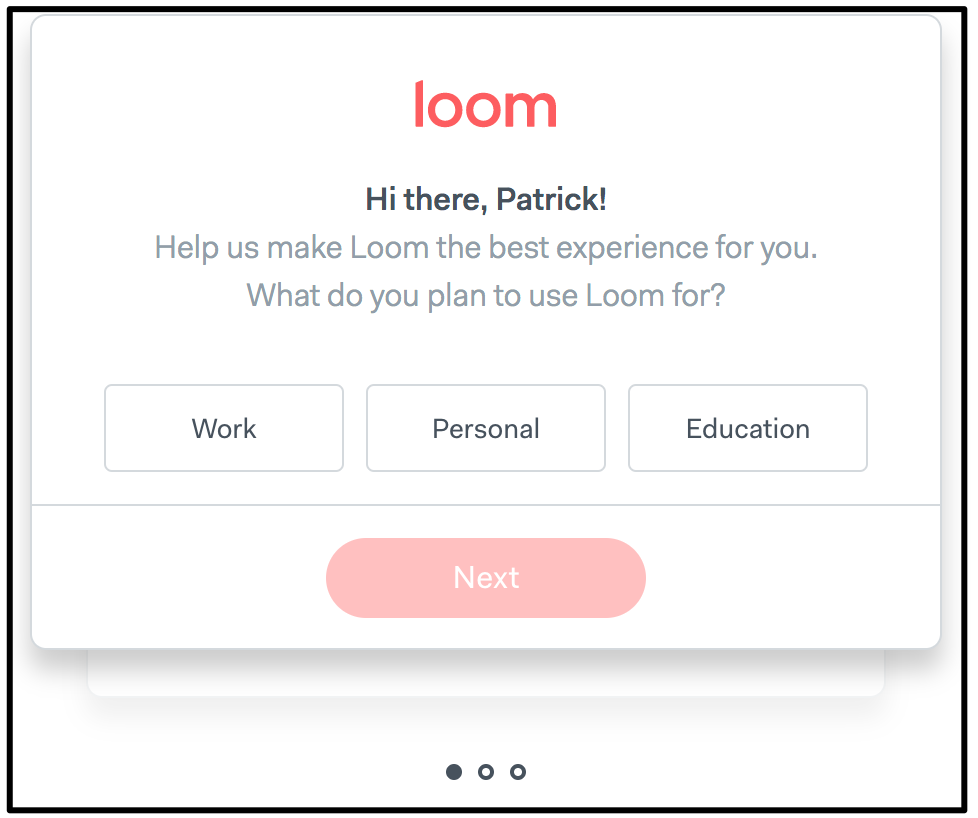
I’ll pick education and then then it asks if I’m a student or teacher. I’ll chose teacher. Then the final box pops up and it wants to know how I will be using Loom. There are a bunch of choices here and may have little to do with education, but whatever – this is free right?
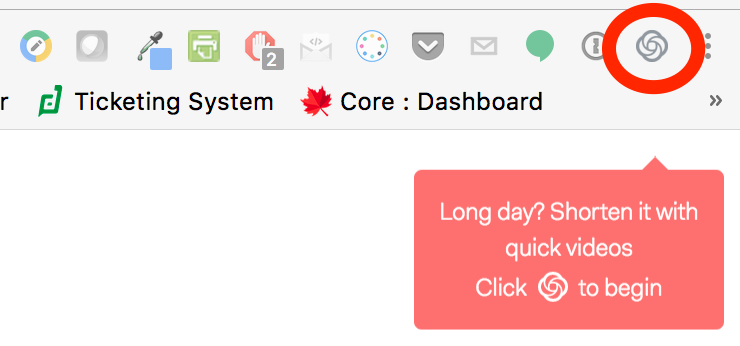
OK – now I get a landing page that will show me how to use Loom and I have a new extension icon showing that it was successfully installed. Awesome! To launch Loom in the future just click that little icon.
What can Loom do?
Most of these web based screen recorders are pretty limited. Usually they can only record what is happening in the browser, may not have audio capturing abilities such as computer sounds or utilizing the laptop mic and more often than not there is a time limit to your recording. Let’s see if Loom can do better.
Once I launch Loom (by clicking the icon in the top right hand corner) it immediately asks for some permissions.
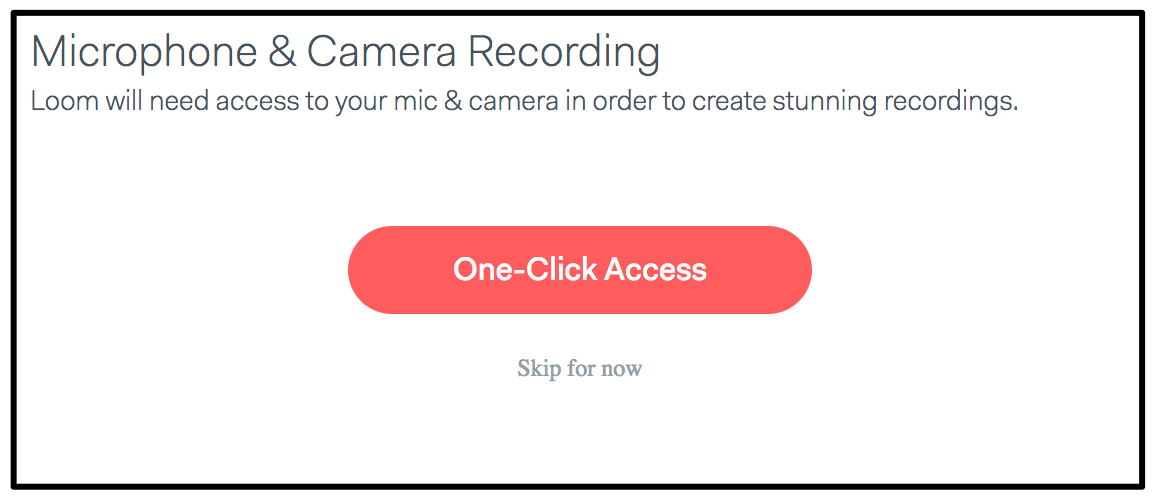
Wow – OK, I gave it permission and then Chrome wanted permission and I OK’ed that and here is what is I have to work with.
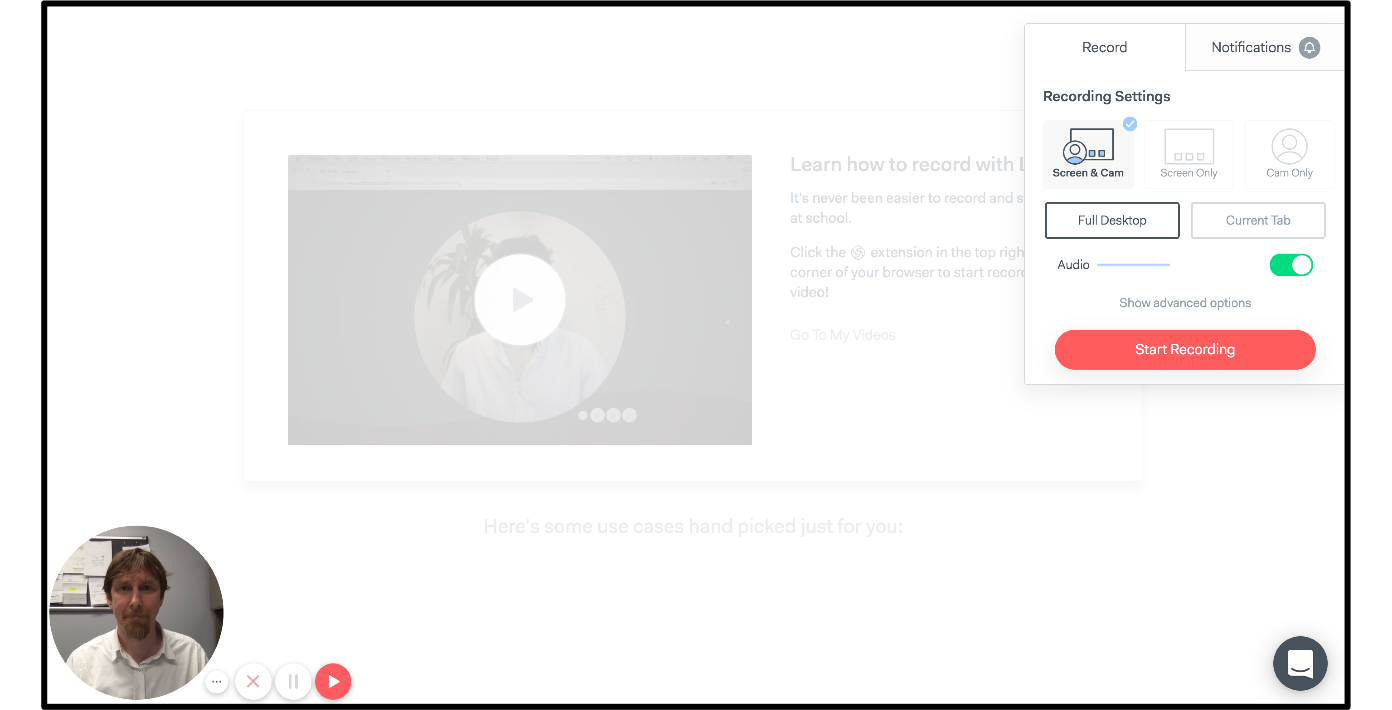
It is using the camera on my laptop to capture my face. I can see that I can adjust my audio and I get some choices about what I want to record. Let’s take a closer look at these options.
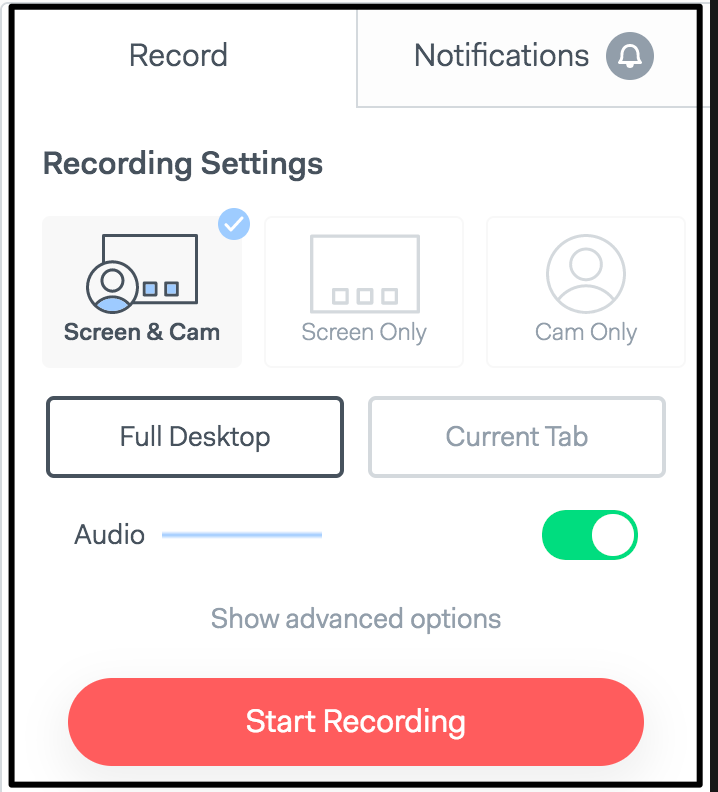
As you can see I have some choices of what I want to record. I can record:
– My screen and my camera
– The screen only
– The camera only
– Full Desktop
– Current tab
There is also advanced settings. Let’s take a peak.
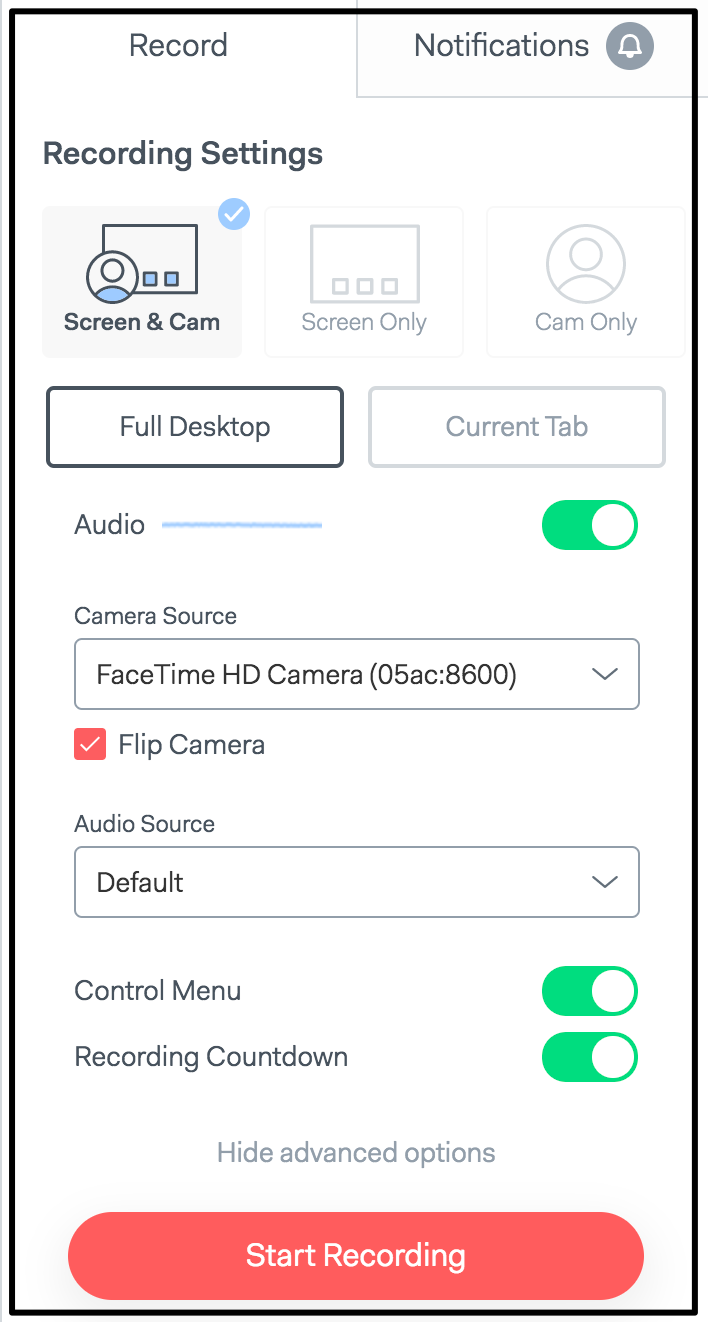
As you can see you can chose your camera source if you have another plugged in and you can also change your audio source if you have a USB mic plugged in. This is pretty nice.
Obviously if you want to start recording just click the Start Recording button you see from this menu or you can click on the play button from the camera options in the bottom left hand corner.
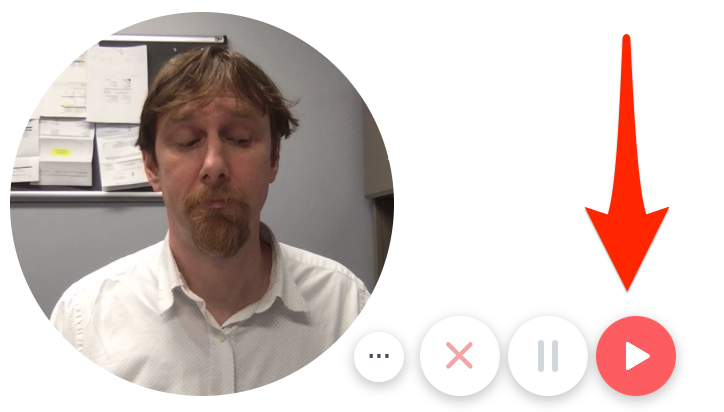
Me, I don’t like people recording themselves while they explain. It is just weird. They can’t look at the camera as they need to focus on the screen and usually the lighting isn’t good and the laptop is almost always below the person you you are “looking up” at the presenter.
Recording
I’ll record the Full Desktop first. When I click on the Record button I get these options. I have a second display so it wants me to pick which one I want to record. Nice! I pick my main display on my laptop and hit record. There is a count down and you’re off!
All the while I am recording you see this little guy at the bottom of the screen so it is easy to stop it.

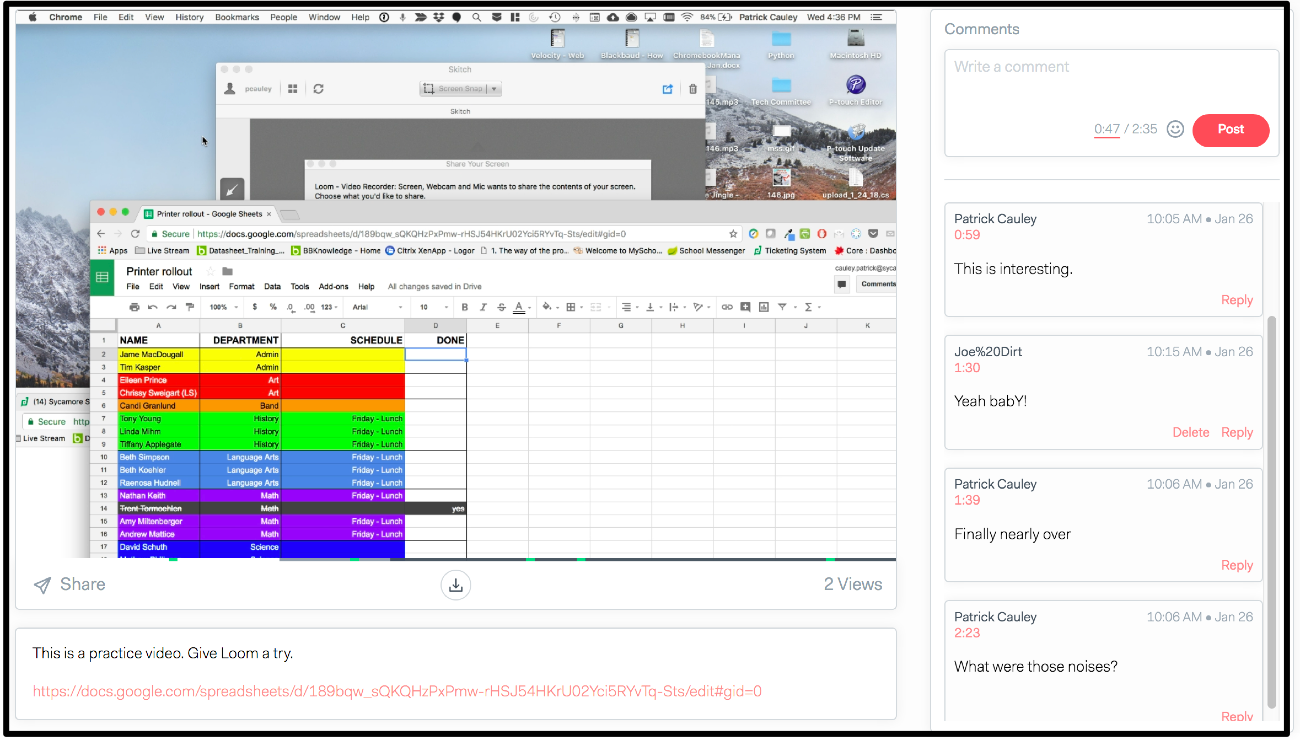
After I stop the recording it takes me to this page which we will go through the good and the bad. First let’s talk about the recording. The audio is terrible. This is because I was recording using the mic on my computer not due to Loom. Use a USB mic people.
The video is nice and smooth. There is some clear decrease in frame rate but that is to be expected. Overall the video looks very nice. Much nicer than I was expecting.
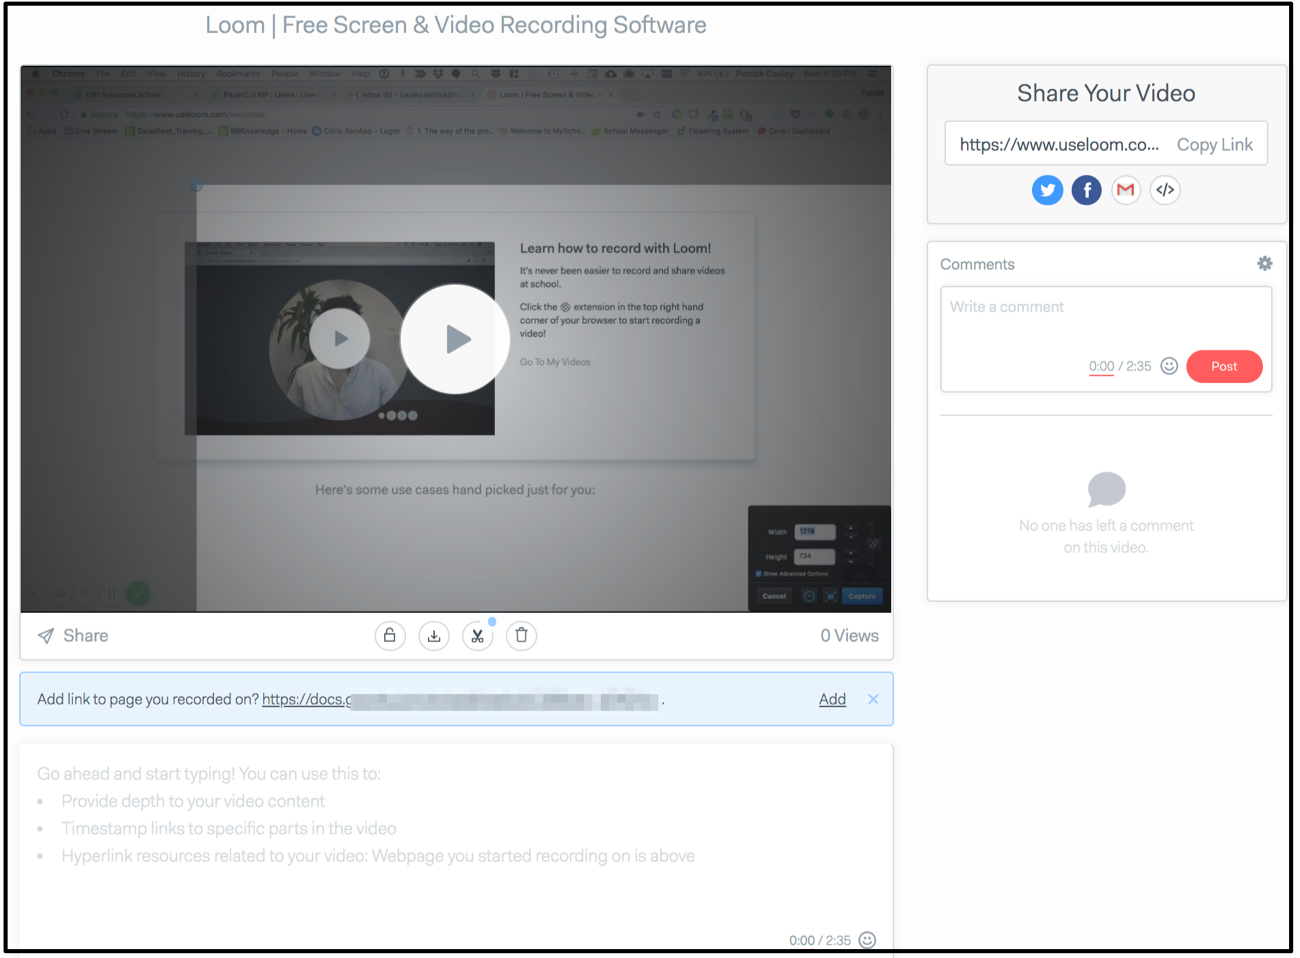
On the right hand side you get the URL to the video, easy sharing buttons and a space to write comments.

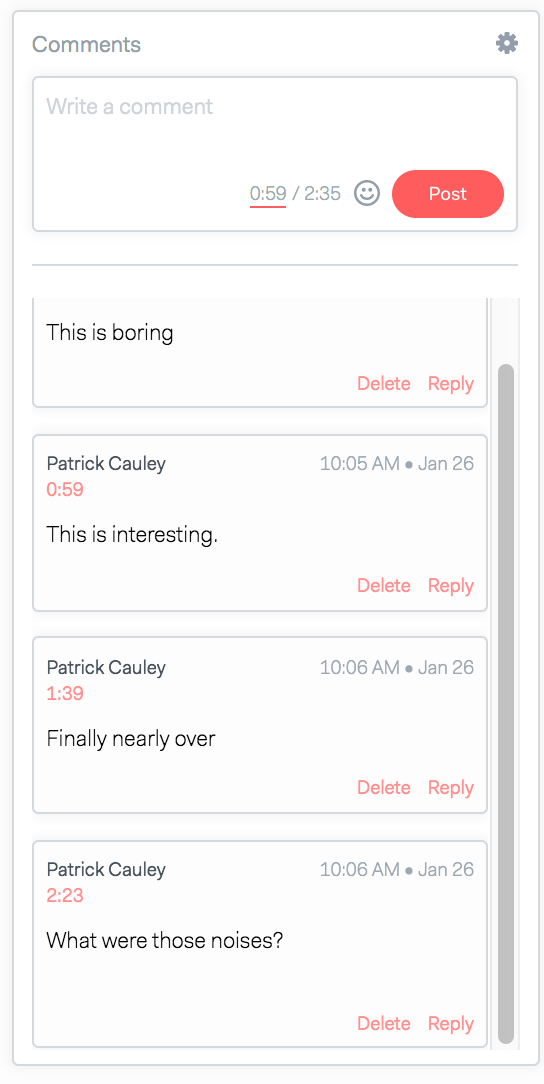
The comments are interesting but unlike YouTube comments, these comments will add a time stamp to them. So if you make a comment during the video and about a particular part of the video it will place a time stamp. Click the time stamp in the comment and it will take you to that moment. That’s a nice feature. It is an easy way to quickly create chapters for your video (if it is long or multiple steps). I like that.
It will even make a green mark on the timeline while you’re watching the video so you will know where comments have been made. Nice little visual cue.

You have some options with comments too.
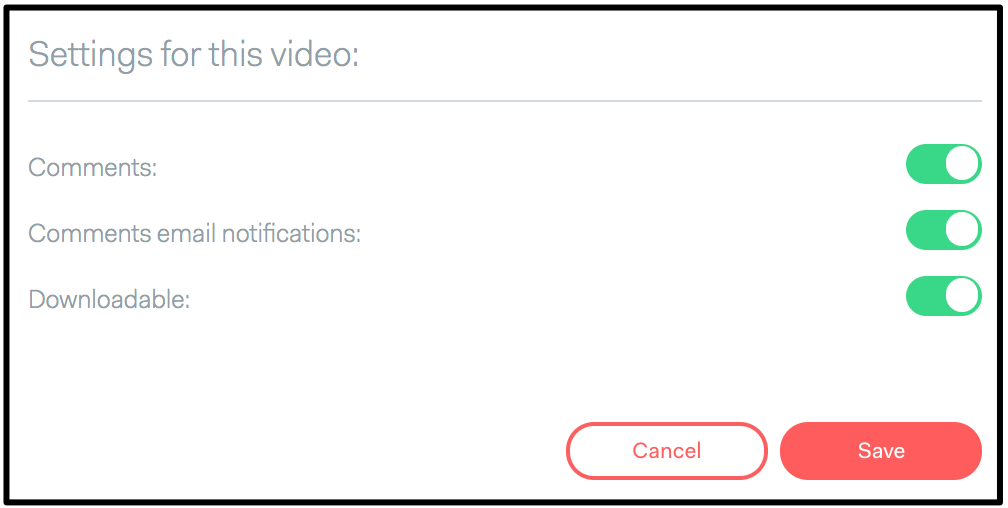
You can:
- Turn them on/off
- Get email notifications
- Make your video downloadable.
OK that last option has nothing to do with comments but there it is. I do have the option to delete comments or reply to them (even if they are not my own) which is good. At first this did not seem clear but after a little playing around these options showed up.
Also guests can add a comment they just have to type in any name whatsoever and it will post. So if you want students to use this have them be very careful about their comments as this is an easy way for someone to anonymously bully a student.
One nice feature is that it asks me if I would like add a link to a particular Google Doc that I was working on. This is nice if you want to do detailed video notes which a lot of people do like to do.
When someone else goes to your video here is what it looks like for them which is pretty similar to what you see.
As far as editing the video goes you can trim parts of it. From your screen click on the scissors.
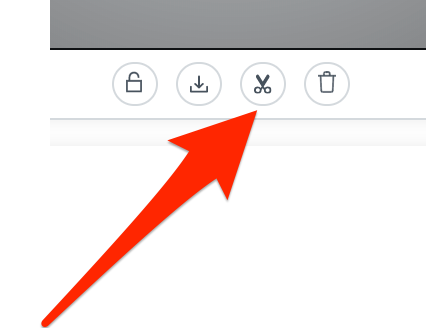
This will launch a new window where you can trim out sections. It is pretty easy to do. On the timeline drag the handles to select a portion of video you want to get rid of and it will get rid of that part. If there is a gap it will bridge then remove the gap and stitch the video together.

If you are recording your face or something else with an external camera this can lead to some jarring effects of very un-smooth transitions.
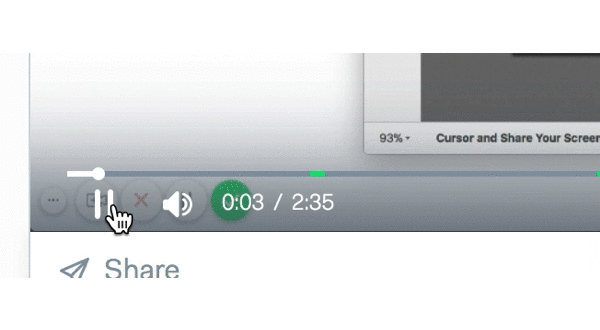
Once you made the cut you have the option to make another, undo your last one (very nice feature) and then re-publish your video.
A little silly
I decided to put this in its own section. While watching a video on Loom you can add emojis to the timeline while watching a video. Check out the GIF below.
I saw a tutorial video about Loom and the entire video had emojis on the timeline. It was a little ridiculous and silly. I don’t think it is a harmful feature but I think it can be a distracting one. I can see students saying Let’s see if we can fill the whole timeline! It doesn’t give a ton of feedback and if there are too many emojis then it just doesn’t work at all.
To me as an educator, this doesn’t bring anything to the table and I don’t have the ability to turn it off. Even if I turn off comments these emojis on the timeline are still there and I don’t think I can get rid of them either.
It is true that they only show up when you are move your mouse over the video and then the timeline and the emojis fade away. Like the section is titled I thought it is a little silly
Conclusion
I’ll get right to it. Loom is good. If you want to make pretty simple tutorial videos you could do much worse than Loom. I wish the editing options were a little more robust and that it would include some volume control but hey if you have no other option and want to make sure that it is accessible right away – this is an option.
A lot of schools (and school districts) ban student access to YouTube during the day. This is a solution to that problem and a good solution at that. You can always download your videos and then re-upload them to YouTube if you desire.
It is in beta right now and for beta it works very well. They do mention in their Help Center that Loom is free but I get the sense that a paid version is coming. Hey-these people need to eat and making something like this has got to take time, money and dedication. My hats off to them.
I didn’t talk about the organizing features of Loom either but this post is getting long so I’ll quickly sum them up. You can create folders and organize your videos. This might not sound awesome but try searching through almost 200 videos to find a particular tutorial you made 3 years ago and then get back to me. It is nice.
One thing in my review I did not cover is that they have Gmail integration. I may explore that at a later time but for right now – if you need to make a quick tutorial video and get it out to your students quickly – give Loom a try. I don’t think you will regret it.
Loom – https://www.useloom.com/
Source: IT Babble Blog and Podcast