Google Forms & Sheets – Olympic Scoring – Part 2
Google Forms & Sheets – Olympic Scoring – Part 2

In Part 1 we talked about the broad strokes of creating a scoring system for my school’s Olympics games. We talked about the services to utilize, how it was basically set up and what skills I used to make everything talk together to accomplish our goal.
This post is all about Google Forms. This is the easiest part of the whole shebang. We willl make a form that lets you pick an event and based on that choice will take you to the event to enter their score or time.
You just need to think about who needs access to the form, how easy will it be for them to fill it out and all that good stuff. When I talked to the organizer of the event he said that he was going to be the only one using the form. This makes a lot of sense for a couple of reasons.
- All the events are outside and our campus does not have outdoor WiFi set up. Staff may not want to use their personal data for a school event.
- Since he will be the only one entering the form, this is smart as it will cut down on mistakes or duplicate entries.
- Some of our events deal with water and some staff may feel a little uncomfortable using their smartphone where there is a chance it could get doused.
So he and the IT team will be the only people with access to the form and the spreadsheet. Again, the fewer people who have access the better. Less chance of any screw ups or unwanted changes to the form or accidental deletion of formulas.
Making the Form
Obviously having a Google account is necessary here. Your school does not need to be a G Suite school but it does help when it comes to sharing it with other staff members.
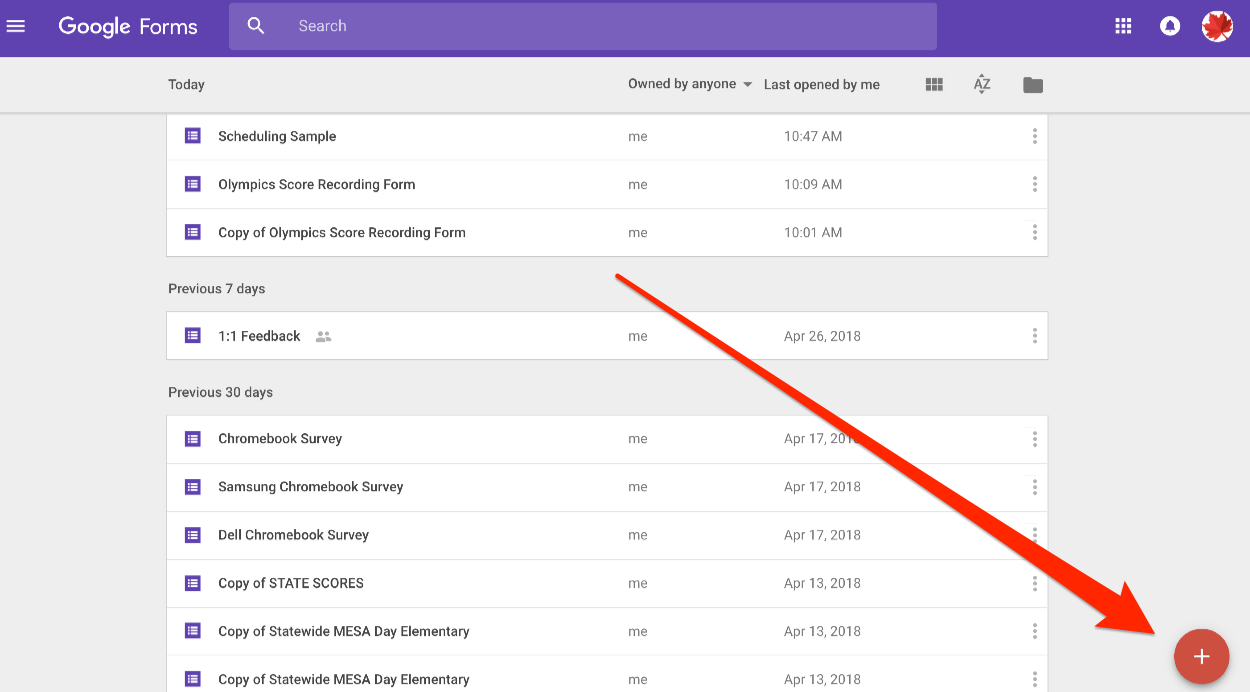
To start a new form head on over to https://forms.google.com and sign in. Once there click on the plus symbol in the bottom right hand corner to create a new Google Form.
Once you get in, you will find it is pretty straightforward.
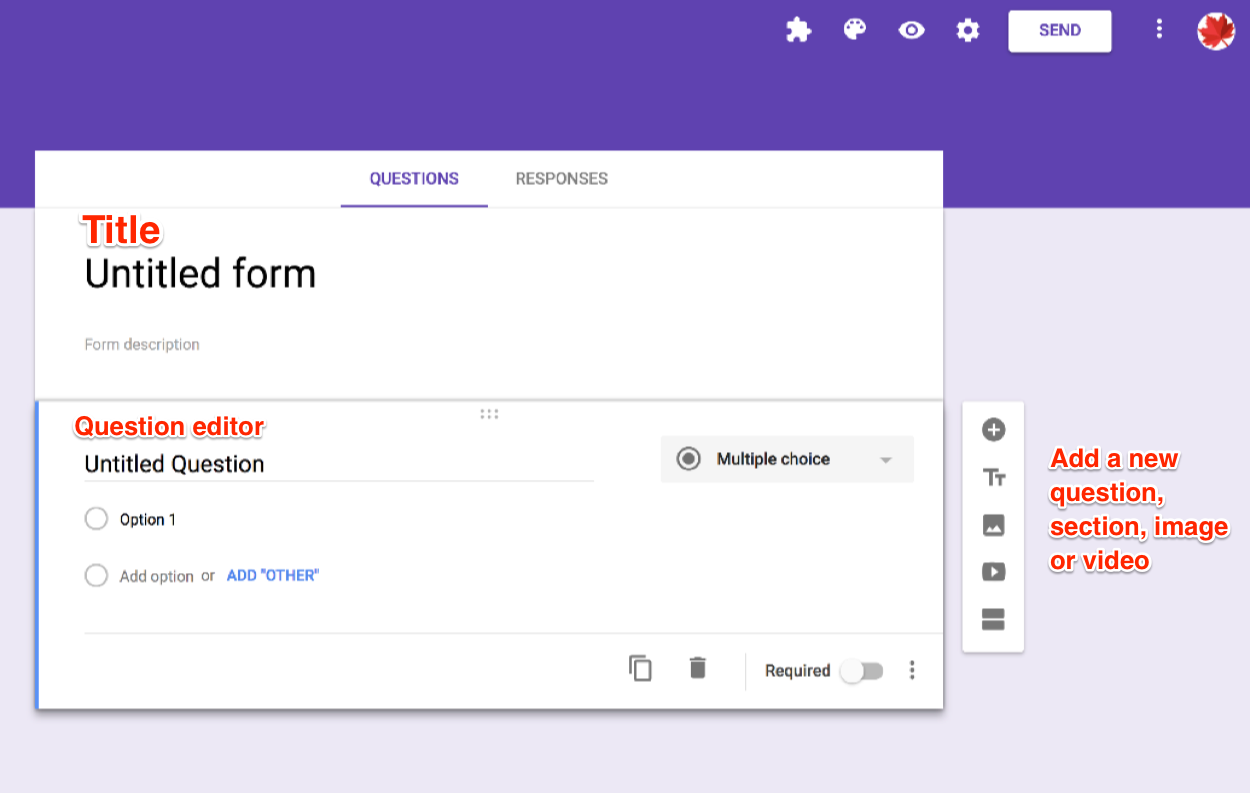
I suggest making all your questions either multiple choice or from a dropdown menu.
DO NOT LET THEM TYPE IN THE EVENT OR COUNTRY
Allowing people to do this will break your form GUARANTEED! People will accidentally misspell the country, abbreviate it or not type the whole name. All of these variations will make tracking the data impossible.
By making all questions multiple choices you eliminate this nightmare situation. They must select a choice provided. This will make all the Google Sheet work possible.
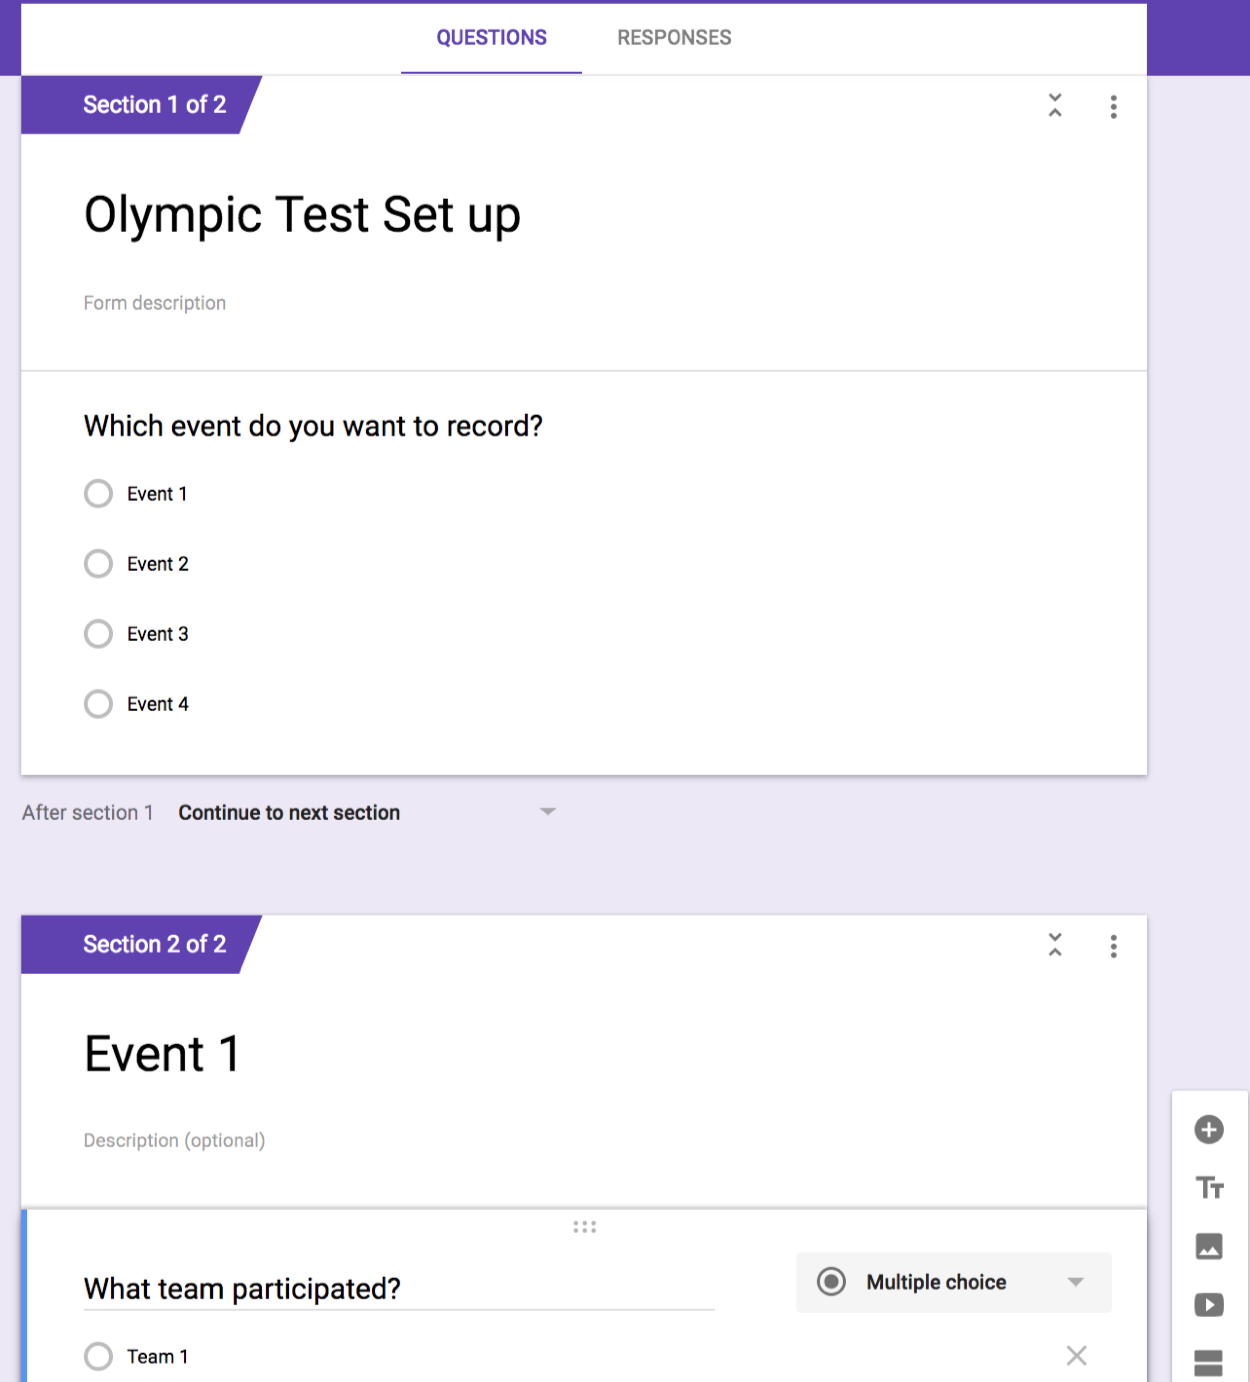
Sections
Rather than have all the questions on one page I decided to make a section for each event. A section is probably what you would imagine. It is a separate section that holds only certain questions. That way the organizer doesn’t have to scroll and scroll and scroll to find the event he needs to enter.
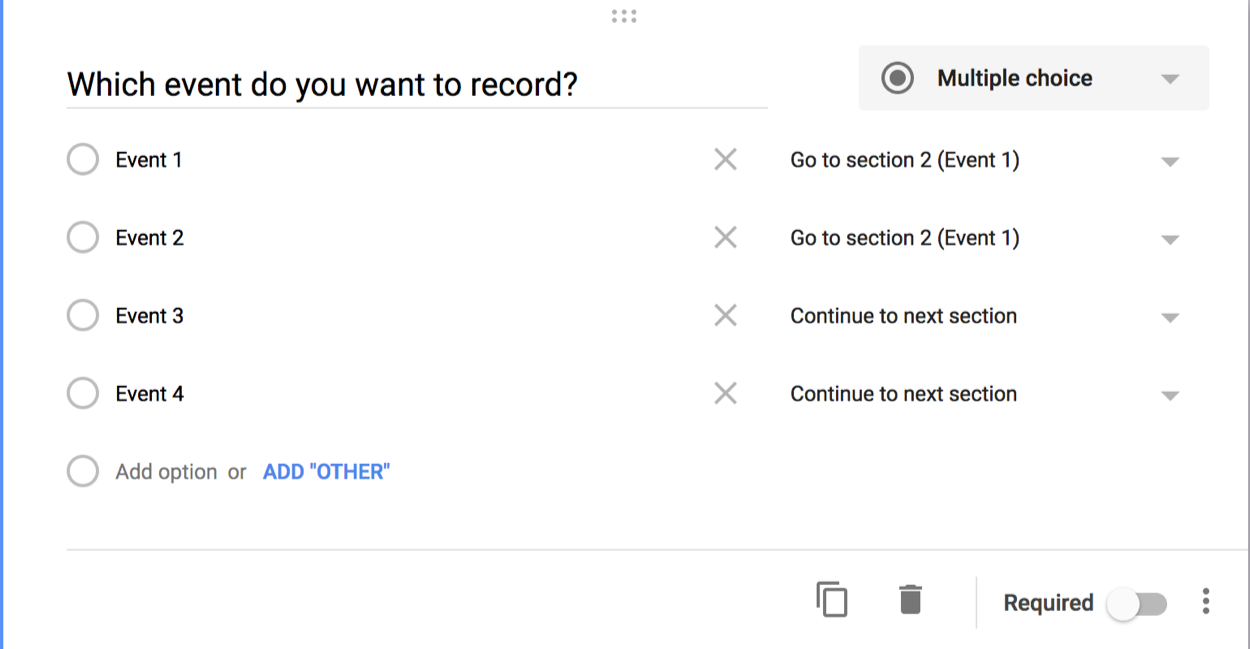
Instead, he clicks on the event (which is question 1) then the form goes to that section for that question. This is known as branching.
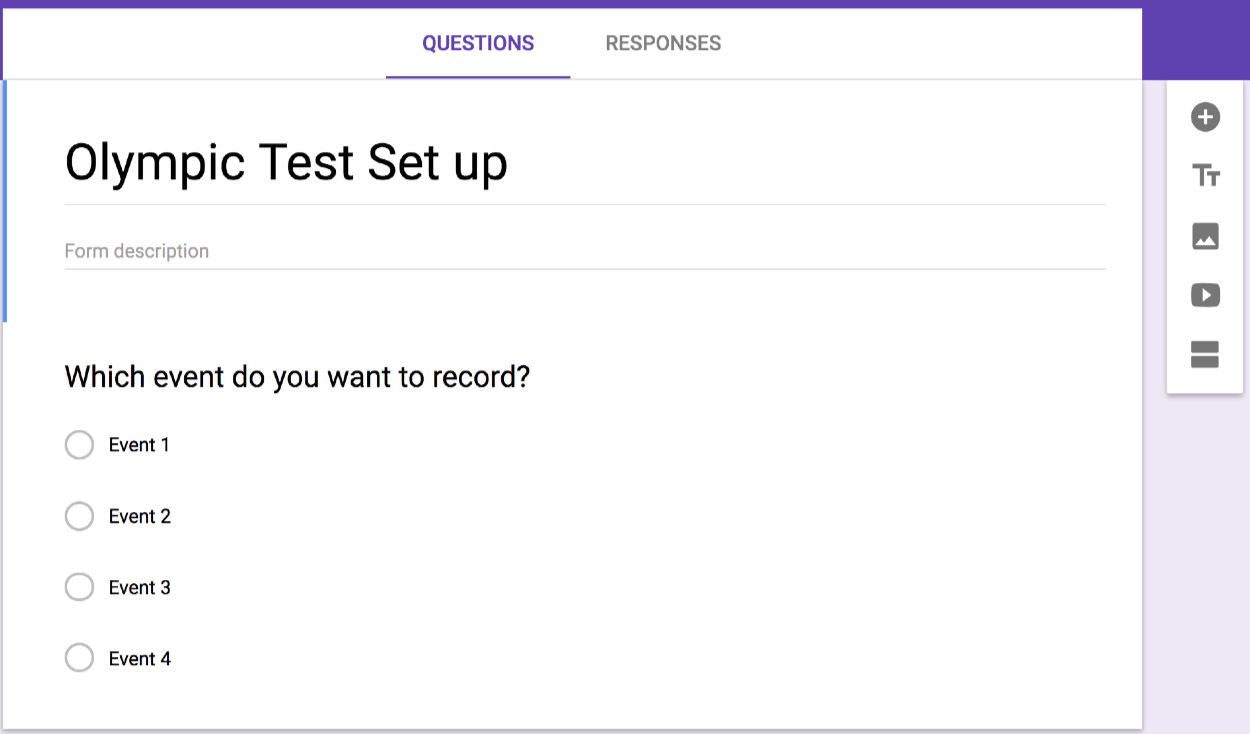
So here is what my form looks like right now.
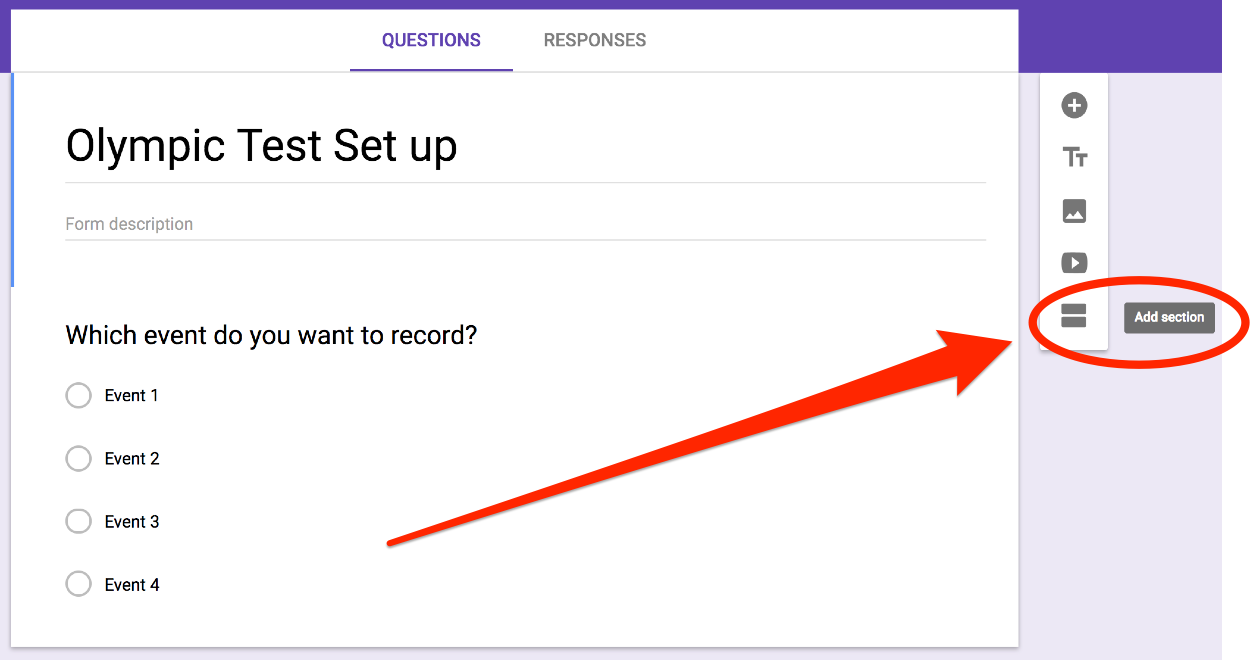
Now I want to make a new section. This is very easy. Just click the new section icon on the toolbar next to the question editor.
Now that the section has been created here is what it will look like.
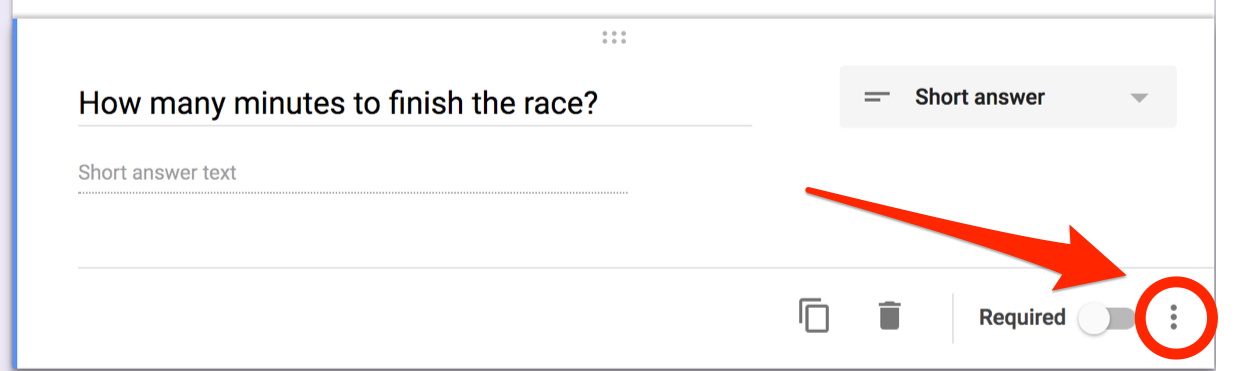
Response validation
Now I want the person entering the form to enter a number for the event. I want that to be an integer (not words) and I want some limitations. I don’t want someone to enter in a negative number or say 3 minutes and 62 seconds.  That just doesn’t work for me.
Luckily Google Forms has something called Response Validation. This can let you put some restrictions on what is inputted into the fields.
Google Forms is pretty smart. For me it automatically knew I wanted a number and went ahead and added the data validation, but if it doesn’t here is how you enable it. Click the three buttons icon in the bottom right hand corner of the question.
Then select Response validation.
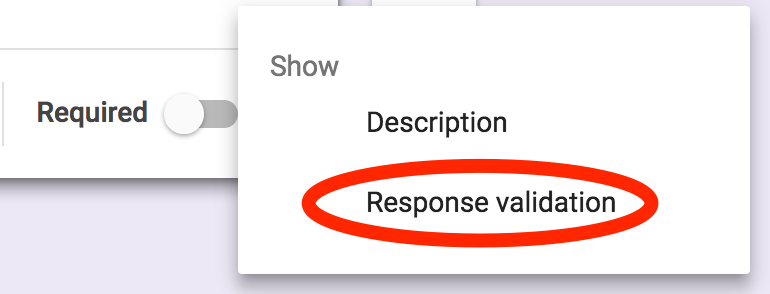
A new area will be added to the bottom of your question.
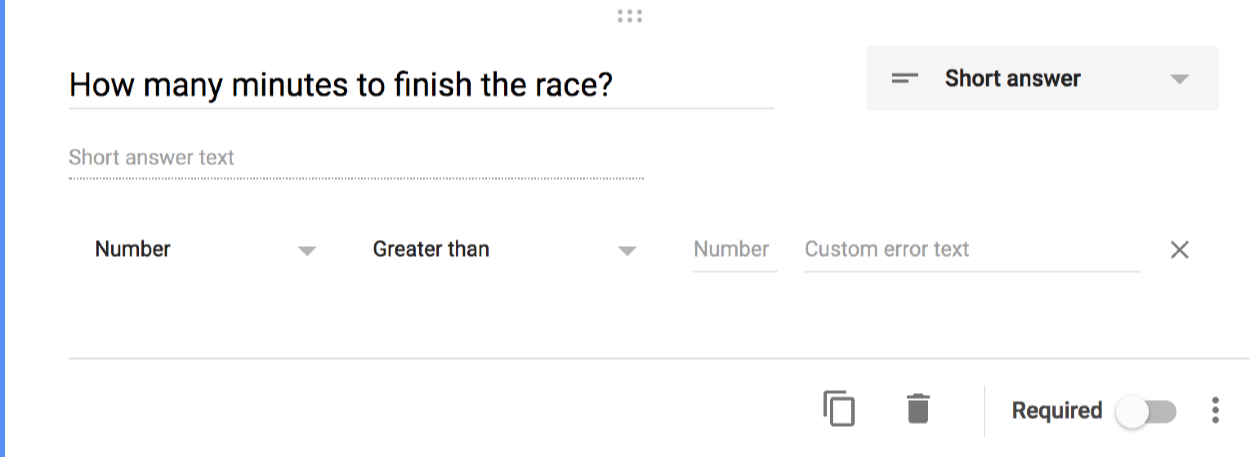
Now that it is there I can set some restrictions. For minutes I will make it a number between 1–30 (I know that is the limit for each event).
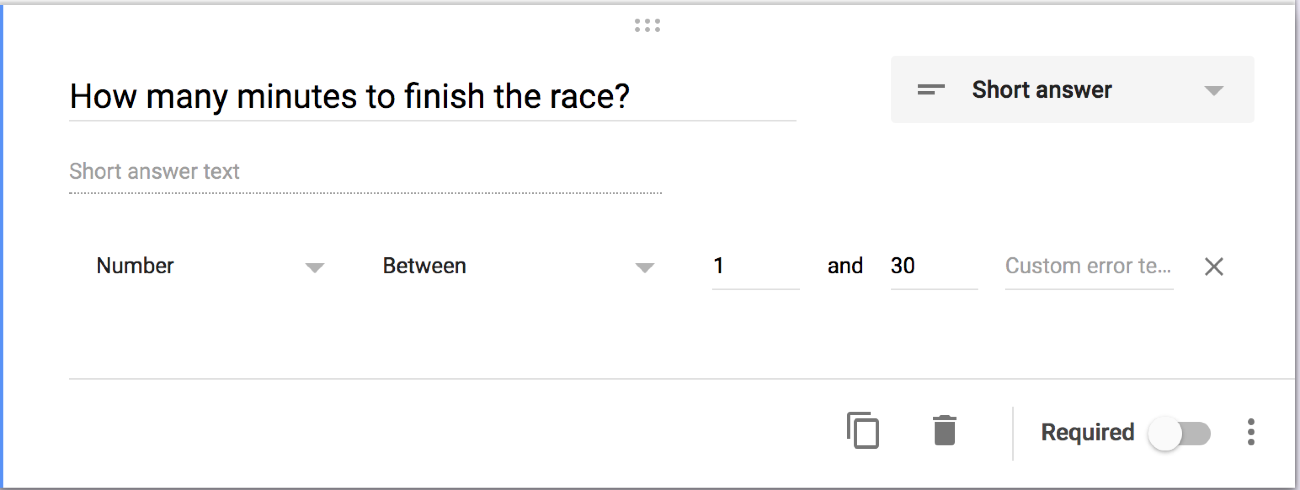
Where it says Number and Between – those are drop down menus and can be changed.
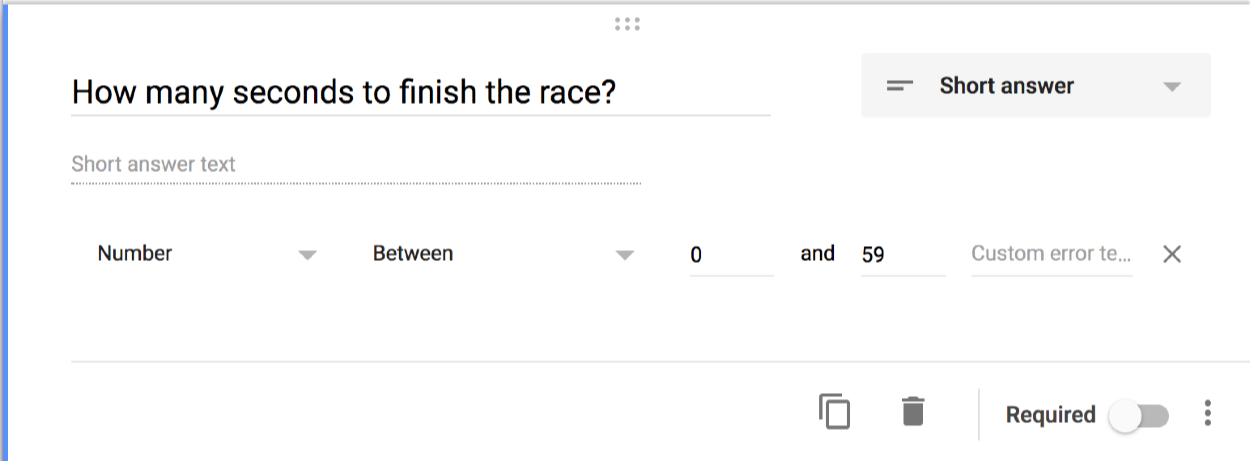
Now I will add another question to ask for how many seconds it took.
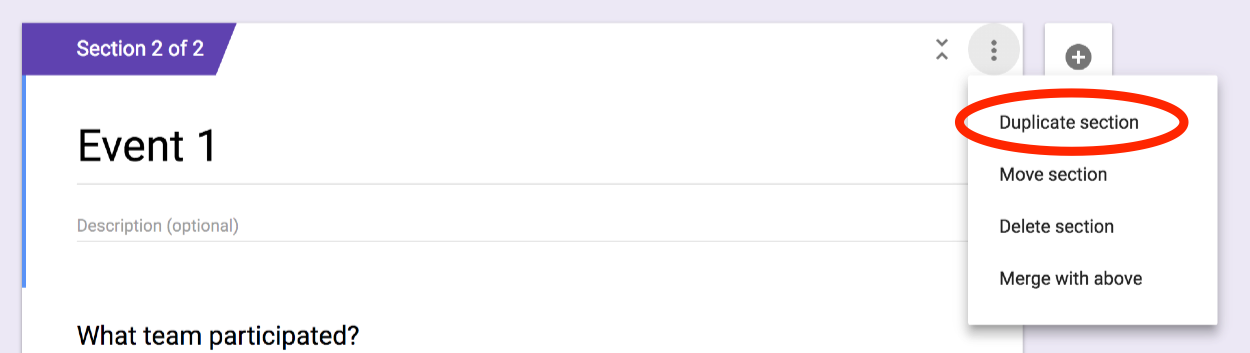
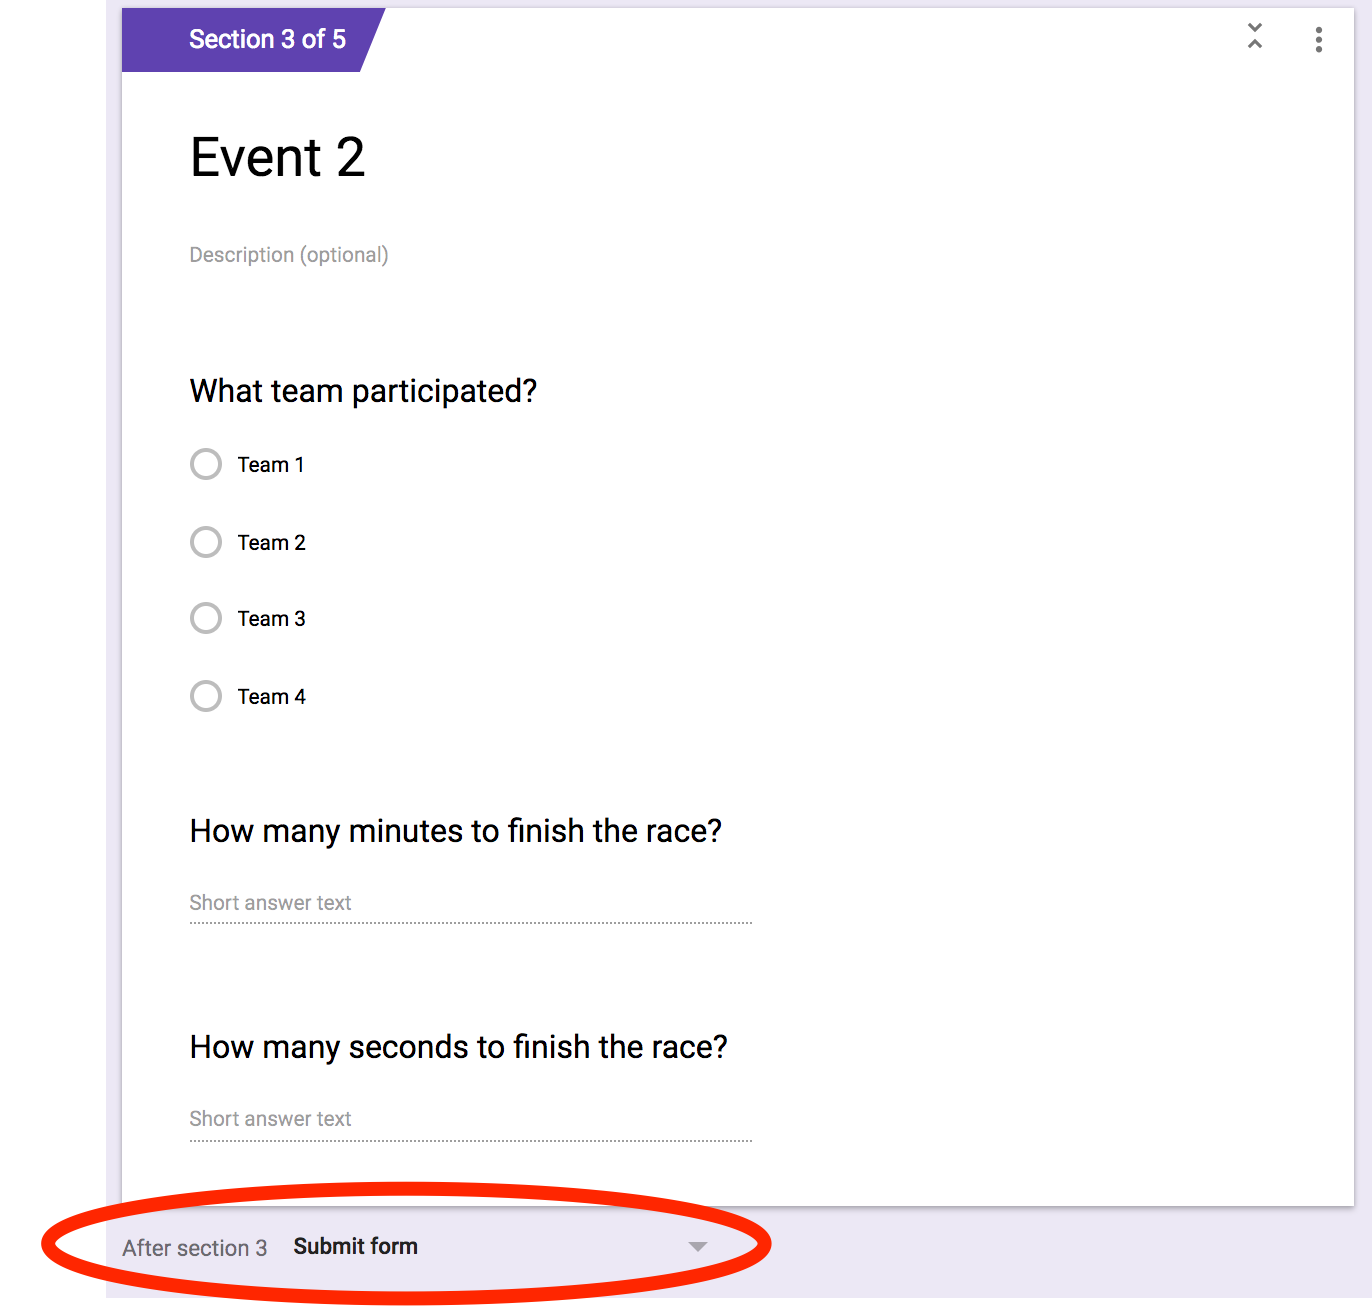
OK that section is done. If you have only races (most of our events are races) then you can just duplicate each the section to how many events you have. Doing this is very easy just go to the top of that particular section, click the three dots and select Duplicate section option
Branching
This is very easy. Now that the sections have been duplicated it is time to do the branching. Basically in section one, depending on what event the person filling out the form answers, we want them to go to that section and skip all the other sections. It sounds complicated but is super simple.
Let’s go to the very top in section 1. Now to enable this feature click the three dots in bottom right hand corner of that section. Then select Go to section based on answer.
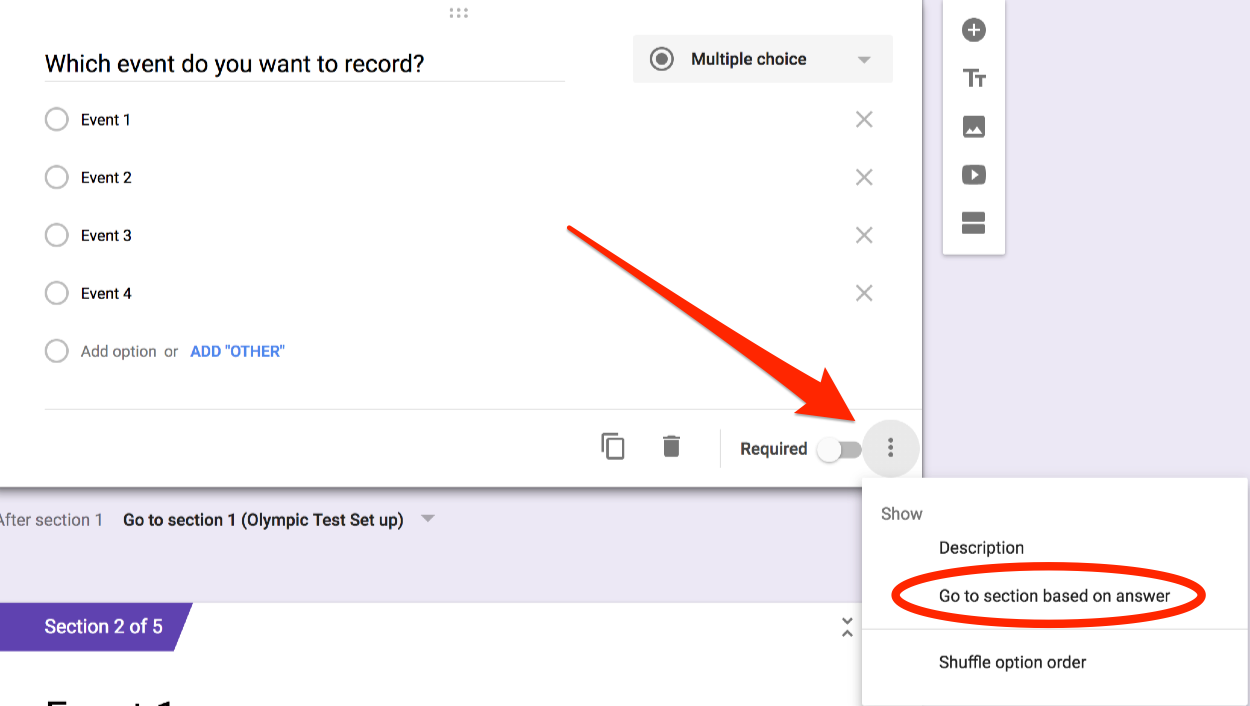
Now the multiple choice question will change a little. It will add drop down next to each question. This is a drop down menu and you simply select the section you want it to go to.
Now go to each section and at the very bottom change it to Submit form. This will make sure that the form submits after that section is complete and you can start the process over again.
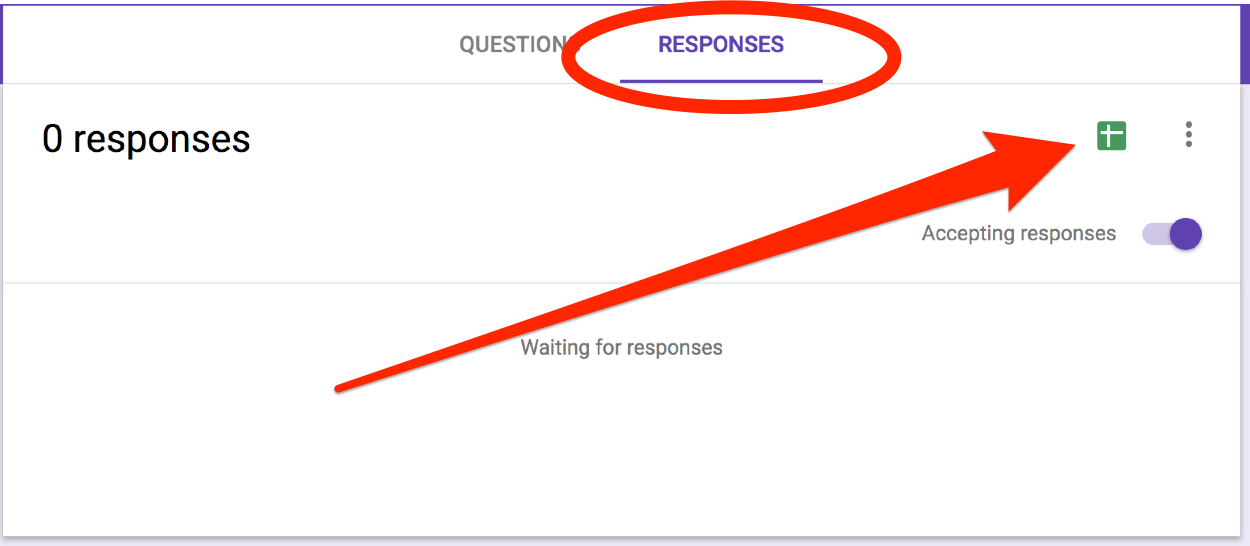
Make a spreadsheet
Last step. Click on Responses tab at the very top of the Google Form. Then click on the Google Sheet icon. This will create a Google Sheet where all the data is stored.
That’s it. It seems like a lot of work but it is really not too difficult especially if you have experience with Google Forms.
Next post will be Part 3 – Google Sheets – Setting up the event
Source: IT Babble Blog and Podcast