Airtame – A review

I normally do not review hardware. Primarily because it costs a bunch of money and I don’t feel comfortable receiving products from companies to review – it just feels weird. Anyway, our school needed a way to stream from a computer to a display or projector for outside people who show up to make presentations.
Our teachers have MacBook Airs and an Apple TV in each room and that works quite well for this, but if someone shows up with a Windows machine, well then it is a scramble to find the right adapter, get them connected, test it out and then realize they want sound as well. Well, then we are scrambling to find an audio cord. It doesn’t take too long but it definitely doesn’t feel professional.
Enter Airtame.
Airtame is a wireless device that plugs into the HDMI port of your display or projector, it is powered through a USB connection and works on both Mac and Windows (iOS and Android will be addressed later on). It costs $299 USD (though if you buy 10 or more you can get it for $249) and has some nice features such as digital signage opportunities and cloud management. Let’s dive right in and I’ll give my thoughts about Airtame at the end of the article.
What’s in the box?
In the box you will find the following.
1) The Airtame itself
2) Micro USB to USB A cable
3) HDMI extender cable (approximately 15cm)
4) A power brick
5) Three types of power plugs
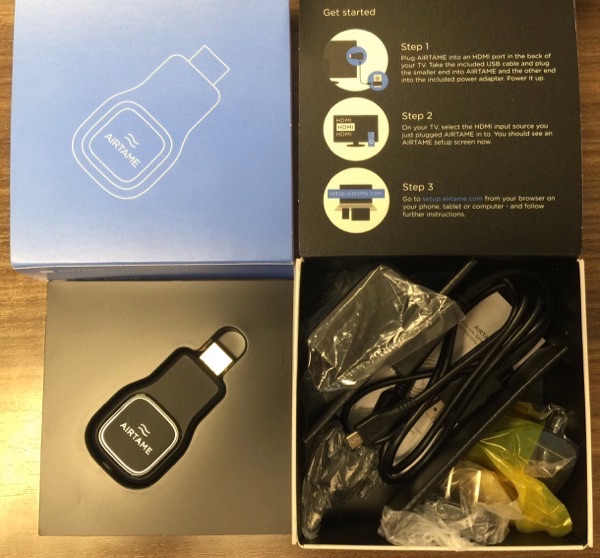
Having a power plug and an HDMI extender is a very nice touch. I’ve seen some projectors with no USB input and so a power adapter is necessary. I’ve also seen some projectors that make the HDMI port inaccessible due to the manner in which it was mounted on a ceiling. Having these extra peripherals included is smart thinking from the people of Airtame.
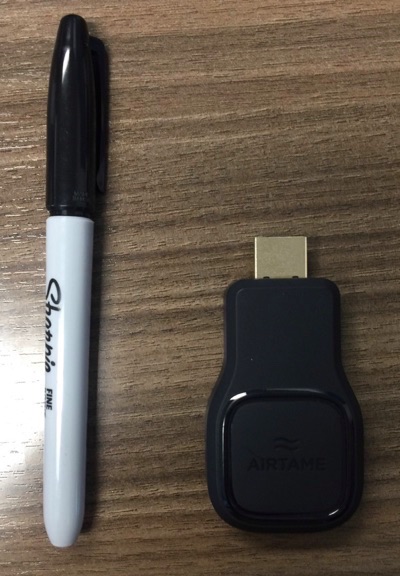
The Airtame itself is fairly small. Though it is a bit wide which could prove tricky for some installations. Here it is next to a standard Sharpie marker.
Setup
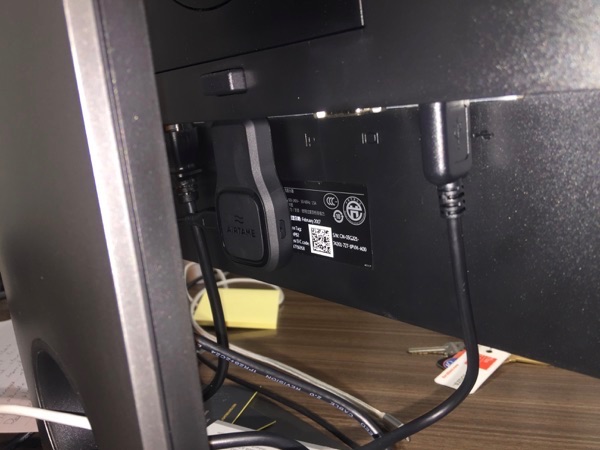
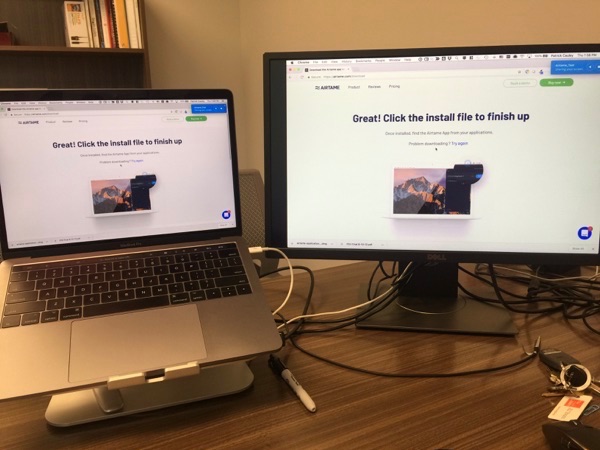
Setting up the Airtame is pretty easy. It basically works like this. Plug it into the device’s (in this case my Dell monitor) HDMI port, plug the USB cord into the Airtame and the USB port of the display and wait a minute for the setup screen to load.
Here is what the Airtame looks like plugged into my screen. Something to note, the USB can be plugged into either side of the Airtame. I just chose not to mess with it this time as it did not affect my set up.
When the setup screen pops up it will look something like this.
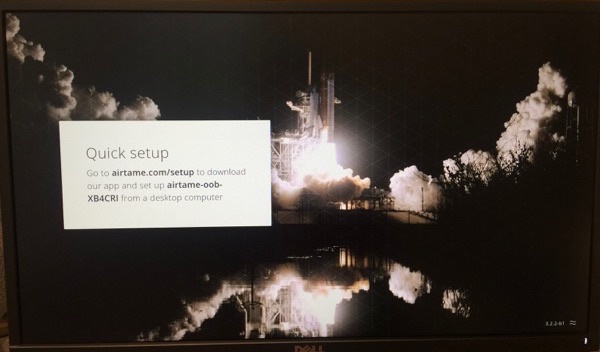
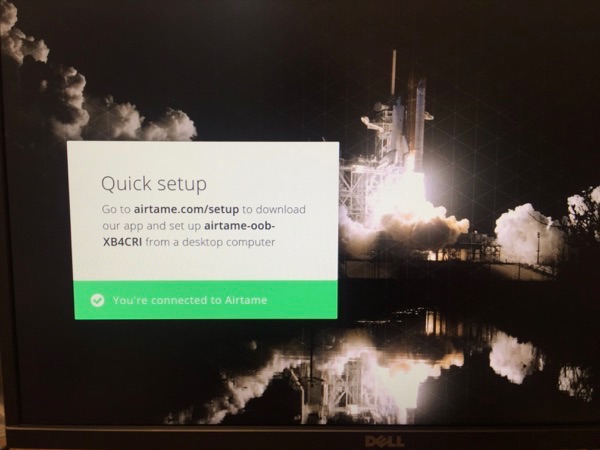
So when you go to http://airtame.com/setup you will need to download the Airtame application to your computer. The application is free, not that big and downloads and installs quickly. However, this must be done with a computer. I do not believe there is a way to set up an Airtame with an iOS or Android device.
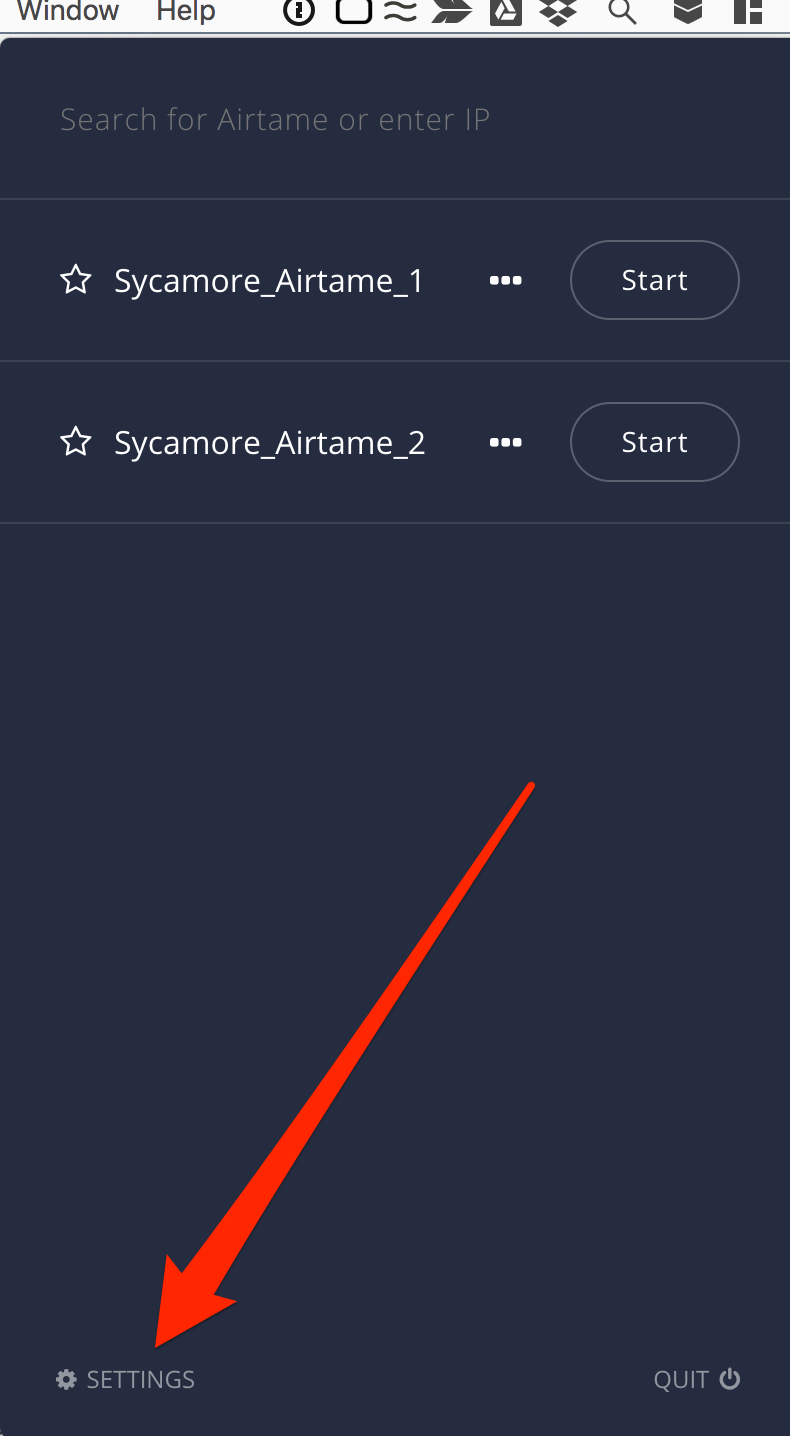
Once installed it lives in the menu bar of Mac and I believe it lives in the system tray on a Windows computer. When you open it up by clicking on the application icon you will see a list of all installed Airtames and any new ones that need to be set up.
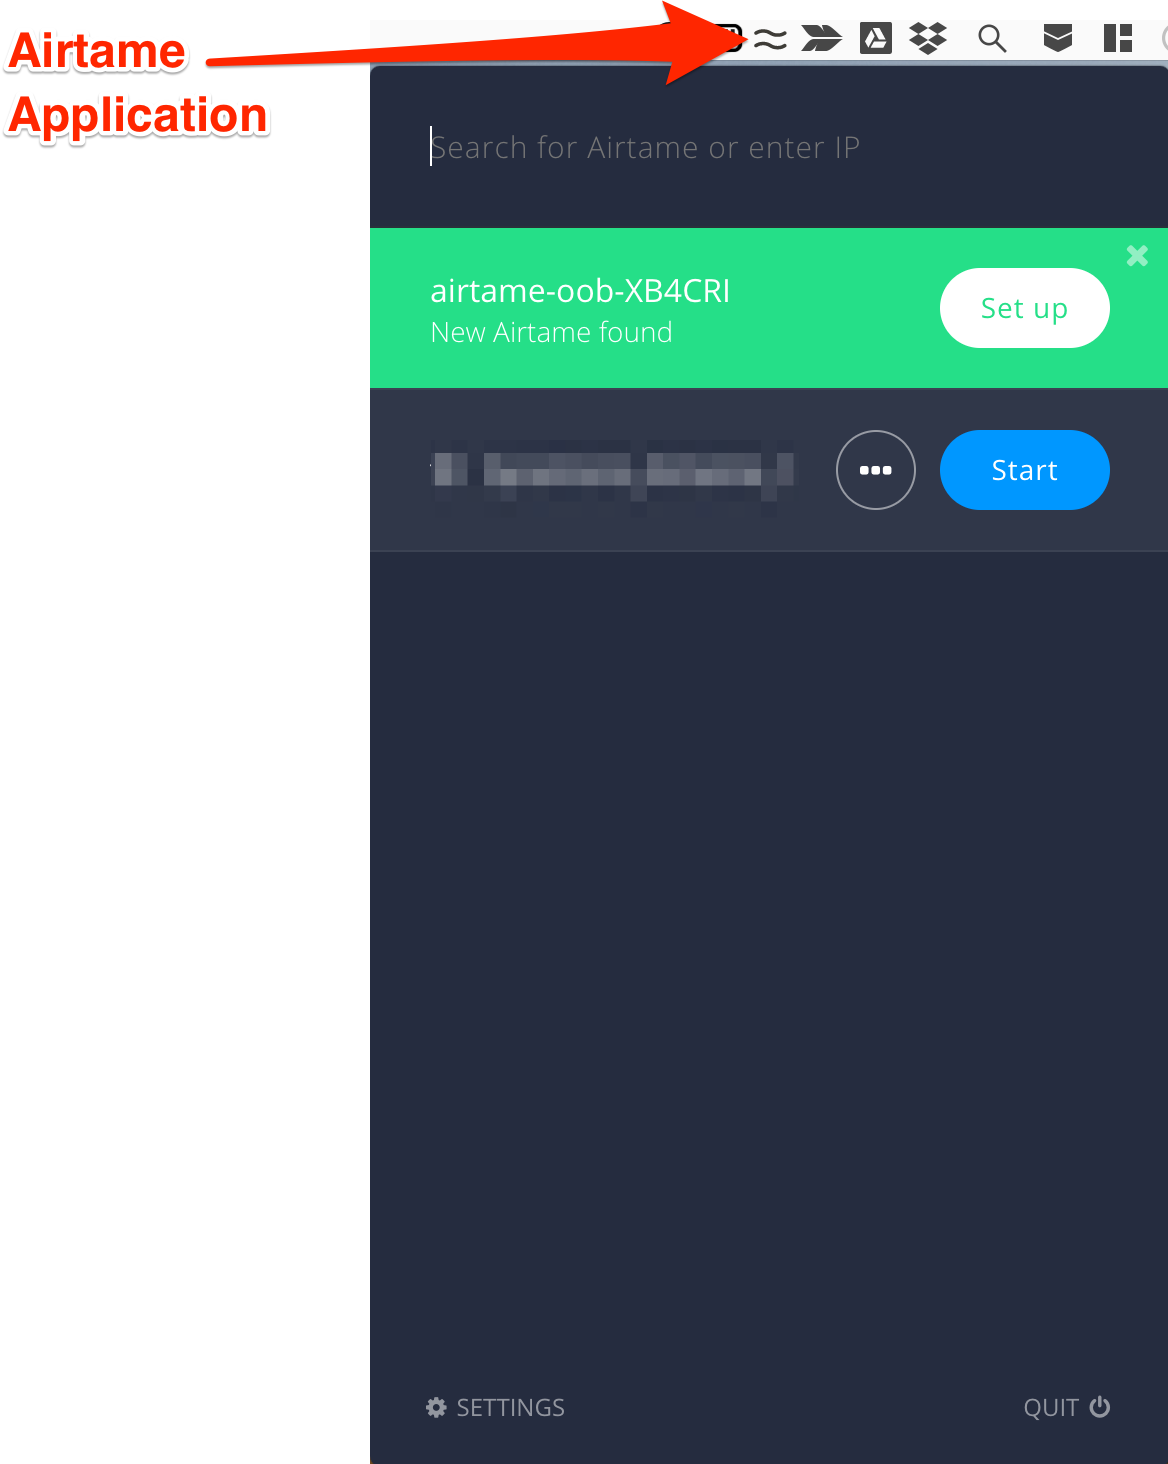
When you click that setup button it will ask you to name the Airtame (don’t worry this can be changed later on) and to select what network it will need to connect to and the password for that network. Then click the Set up now button.
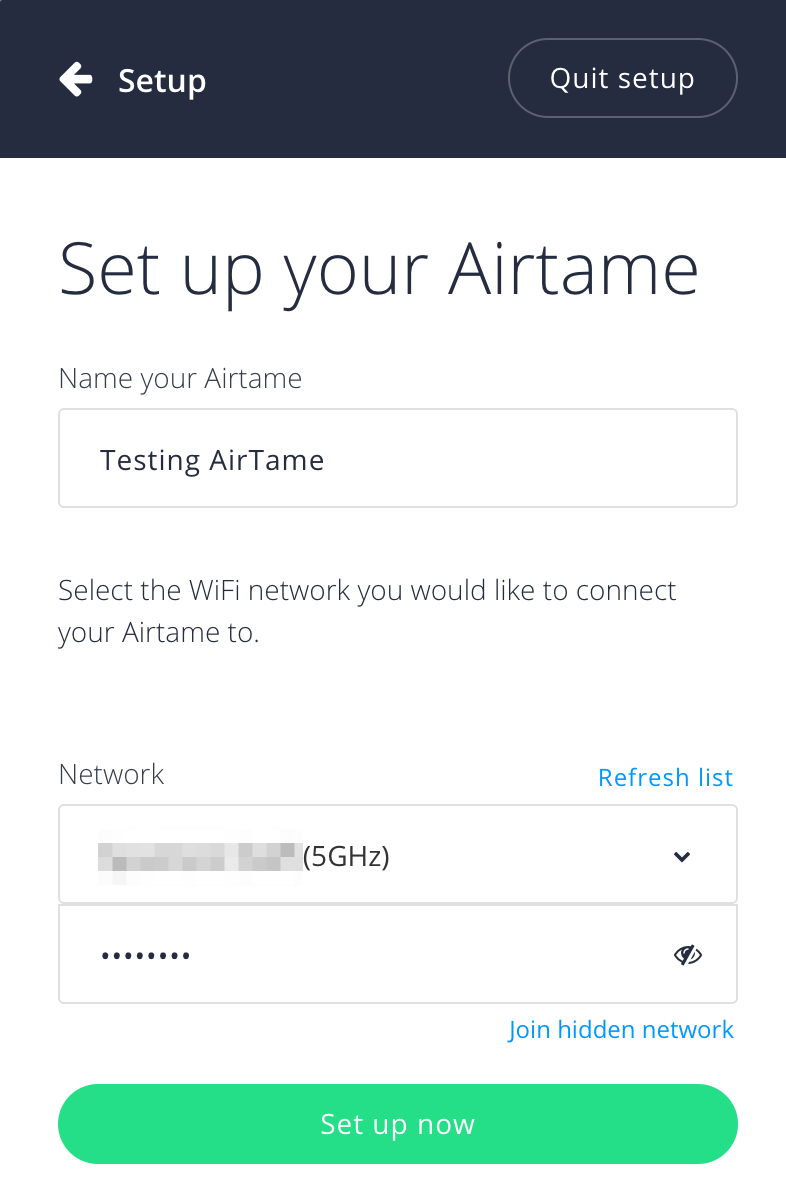
What happens next is pretty neat. The Airtame has its own WiFi hotspot that your computer will connect to. Once connected it will transfer the new name and network information over to the Airtame. Then your computer will disconnect from the Airtame network and then reconnect to your old network. The Airtame will also rename itself and then connect to the same network. Thus letting the two talk again.
All the while the Airtame will be giving you visual clues that this is happening and it all happens fairly quickly which is nice.
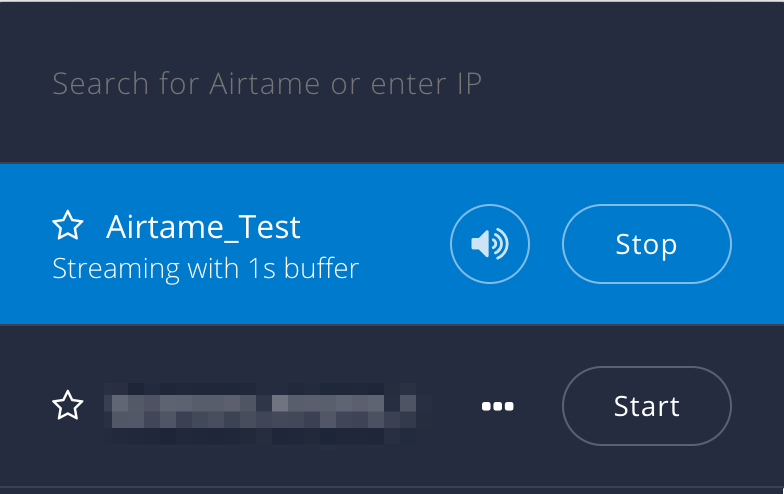
When you’re done the Airtame will let you know and when you click the Airtame app your new streaming device will appear in the list. To start streaming click the Start button. It’ll connect in a few seconds and you’re ready to present!
Streaming
The Airtame is set up and you’re streaming your screen to another screen. You can only mirror your desktop which means whatever you see on your computer screen is what others will see on the second display or projector. The quality is pretty good if you are streaming a slideshow, website or basic documents. The basic settings on your Airtame will be more than suffice. If you stream animation or video the quality starts to drop but we will talk more about that a little later.
By default the Airtame does not stream any audio. If you want audio you will need to open the Airtame app and click the sound button (next to the Start button).

This will create a 1 second buffer to give the Airtame app sufficient time to process the audio and to help that it stays synced with the video (if there is video).
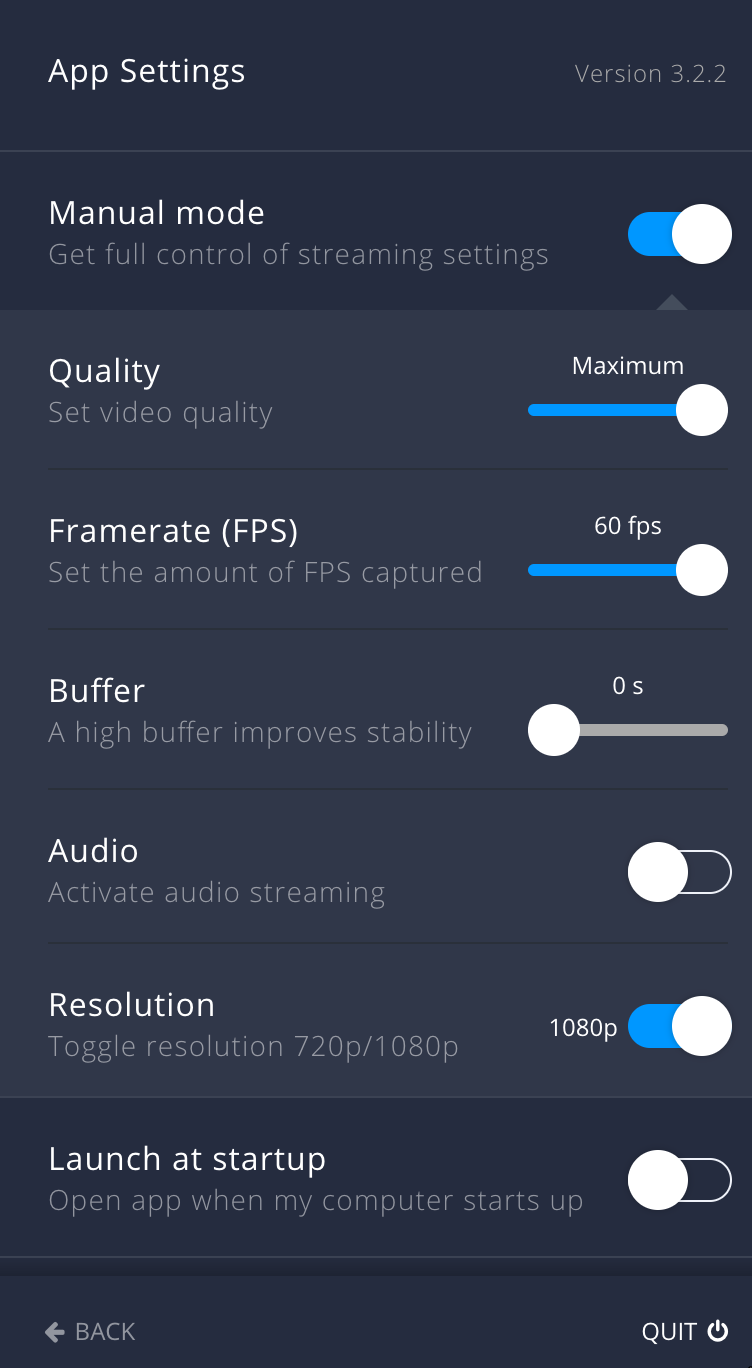
Airtame has a huge amount of options when it comes to streaming. Just click on the SETTINGS link in the bottom left hand side of the Airtame application. Then toggle to Manual Mode
Here you will be greeted with all those settings. You can change the quality of the image, the buffer (0–30 seconds), the resolution and more. Just look at those options!
Now regardless of those settings – streaming a 1080p movie from your computer to a projector for two hours should work in theory, but I would not expect anything close to Netflix quality. The Airtame can do this (not 4K though), but it’s not the greatest. You may have image issues and audio not syncing with the video is also a possibility. Our teachers experience this even with the latest version of the Apple TV, so streaming still has a ways to go before it is truly seamless, but for basic streaming the Airtame is more than capable.
Guests connecting
Having guests connect is just as easy. The Airtame displays a pretty space picture and then there are instructions on how to connect. Check out the screen below.
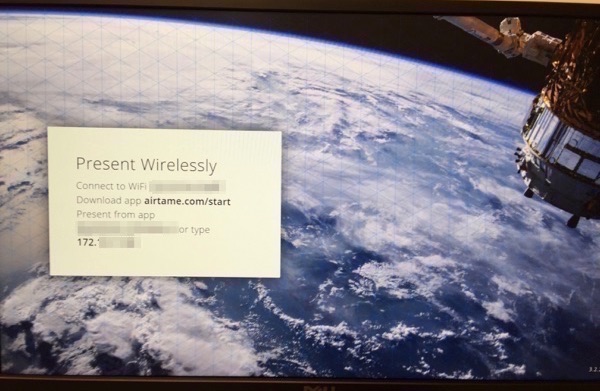
Now this works fine with Mac computers, Windows computers and I’ve even gotten it to work with our Samsung Chromebook 3’s which is pretty wild.
They will connect to the same network the Airtame is on, download the app and the Airtame will show up in their list. It is really quite easy and so far I can’t seem to find any fault in this. It’s certainly not as hassle free as the Barco Clickshare solution but then again it is considerably much cheaper than a Barco.
On Android and iOS devices it is limited. You need the Airtame app and then you can only stream images, slideshows or certain files from your Dropbox account. So there are those limitations but wait! There is some news. In a beta version, Apple’s Airplay is enabled. This means that from an iOS device you can mirror your screen! This is impressive and I hope an Android option is coming soon.
Signage
The Airtame has a neat little trick up its sleeve. It can serve as a digital sign. When you first power it up there are these wonderful space images, but if you would like to have your own images, slide show or dashboard present instead you absolutely can.
Just access the settings (where Manual Mode is found) and you can change where the instructions are located on the screen (if at all) and you can point the Airtame to a website, an image (either web based or uploaded from your computer) or leave it to the Default space images.
If you point it at a website (say a Google slideshow). It will display that over and over again. A great way for students, parents and staff to see some basic news about upcoming events. Since the Airtame is so small and since a Google slideshow can be updated anywhere it makes it super easy for even basic computer users to create something to share with a large group of people.
They also support a number of dashboards. Now from an school perspective, we wouldn’t have a ton of use for this but then again maybe I’m just not dreaming big enough.
Cloud management
Now we are talking about some fun stuff. An issue we have with our Apple TV’s is that some are updated, others aren’t and when there are issues we typically have to go down there, unplug and take it to the IT Office to test it out. There isn’t a convenient way to remotely manage these devices. I know that you can put them in a system like Filewave but that seems like overkill.
With the Airtame Cloud I can easily enroll these devices and have all the control over each one or a place them in a group and manage the group if I wish. I can change the resolution, point it to a website, reboot it, change the background image add a PIN code to it and even update it to a beta version to get newer features. Check out the very simple and easy to use dashboard below.
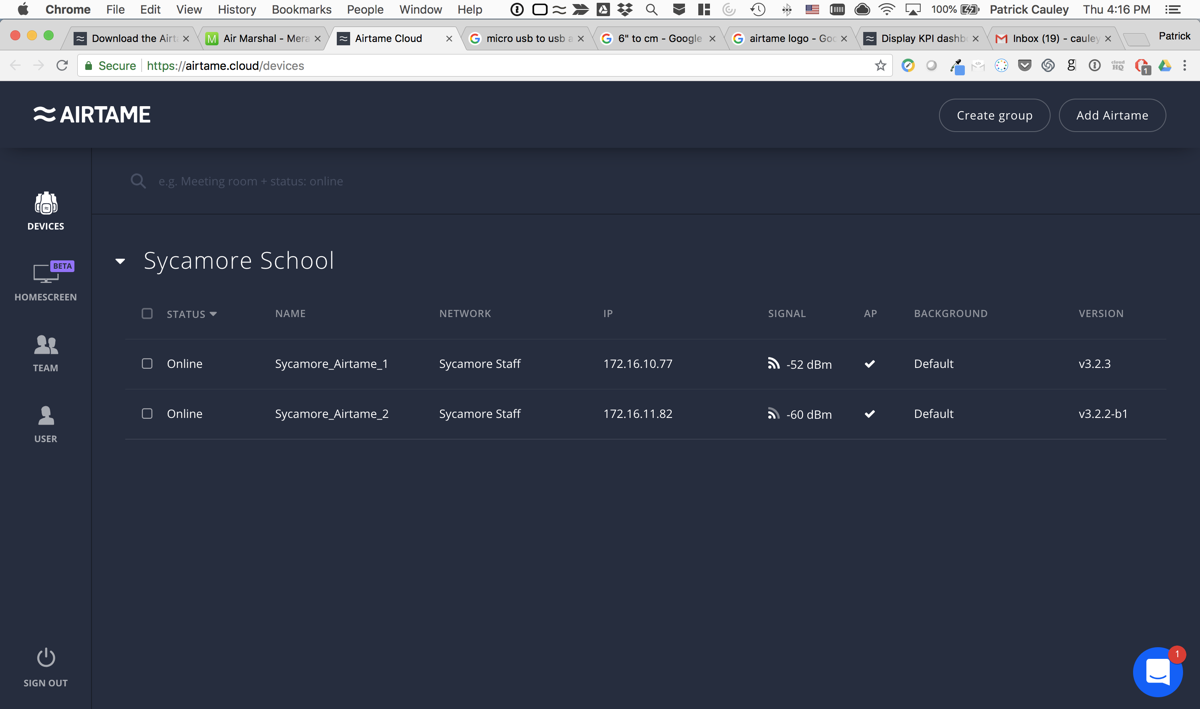
It is very easy, intuitive and if you want to update all the Airtames on 5am Sunday morning from your home then go right ahead. You can watch the process while you sip on some tea or coffee.
You can also invite people to help manage the Airtames making it a team effort. That way if one person is unable to assist, then there is a backup.
Should I ditch Apple TV?
OK, this is certainly a great question. If you and your staff use Mac then no. The Apple TV allows teacher to not just mirror but extend their display which is very, very handy. It can allow teachers to have a window that only they see while presenting something else to the class. Also, the image quality on Apple TVs seems to be higher than that of Airtame. Let us not forget the cost. a regular 1080p Apple TV costs $149 USD.
If you have a mixed environment then the answer is probably yes. While a more integrated and centrally controlled system like a Barco Clickshare is probably more desirable the hefty price tag that comes along with it certainly makes Airtame a lot more attractive.
We have two Airtames and will most likely pick up some more. I think that they are definitely worth the $250–300 price tag especially considering the alternatives on the market and all the features it offers.
Wrapping it all up
Airtame is pretty great. It really is. For the price you get digital signage, a streaming device that is quite small, portable and a way to remotely manage them that Apple TVs cannot do.
While I wished the quality of the image was a little better. What the Airtame does deliver is quite adequate and since it is pretty simple to connect most devices to an Airtame this makes it very useful and flexible.
Also, let us consider how quickly they update and try out new features often. The current Airtame beta version gives you the access to use Apple’s Airplay and the ability to stream a single window. It seems that the people at Airtame are always working, tinkering trying to deliver a great product with great and practicable functionality.
If you’re looking at a wireless streaming solution and not sure where to start check out Airtame.
Source: IT Babble Blog and Podcast