YouTube – How to make a playlist
This is pretty easy and certainly not a new topic but YouTube does change a bit over time so I thought I would put together this hand dandy little guide (with beautiful pics) to help you out.
Keep in mind you must be logged into YouTube in order to create your own playlists to share with your students or to to keep for your own teaching (or personal enjoyment) needs.
Why make a playlist
If you’re big into lesson/unit planning this is a great way to organize these resources and have them on hand year after year. It’ll save you a bunch of time so you won’t be scrambling around for the last minute. I’ve perused YouTube plenty of times, stumbled across a great video that would assist my class and just dropped it into a playlist and keep on perusing.
Step 1 – Go to YouTube and get saving
So head over to YouTube and start looking for some of those videos. When you find a video there are a couple of ways to add it to a playlist. You will see an icon with three lines and a plus sign along the same row as the title of the video. Go ahead and click that.
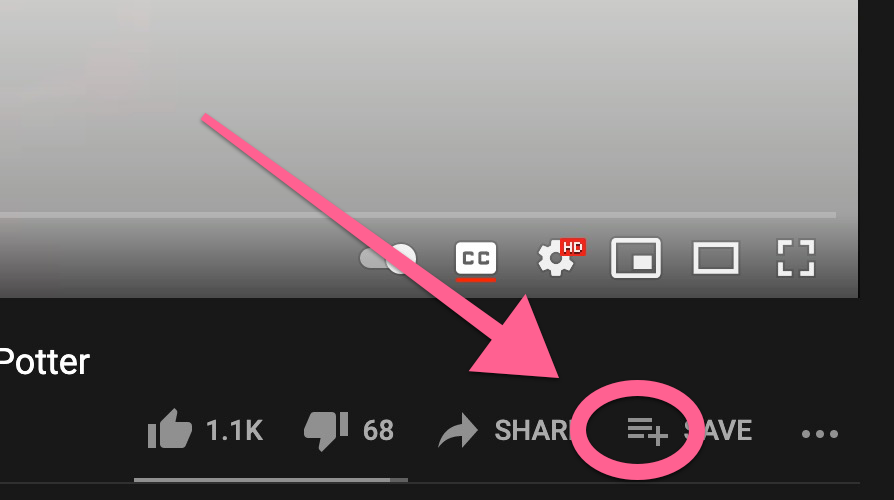
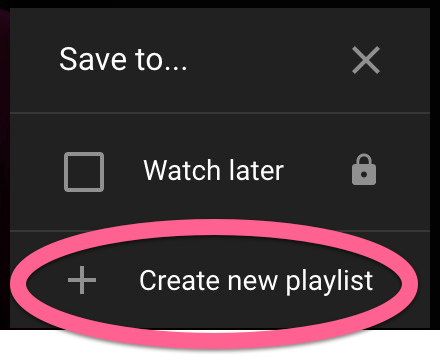
When you do a small window will pop up asking you which of your playlists you would like to save it to. Everyone has a playlist called Watch later, but you will most likely want to create a playlist. So you will select + Create new playlist.
When you do that you will get the option of naming the playlist (don’t worry you can rename it later if you’d like) and then you get the option of how public it can be.
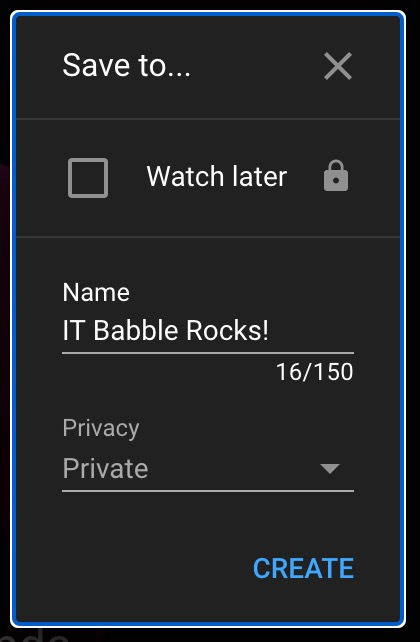
Here are your three choices:
- Private – Only you can view it on your account
- Unlisted – Anyone can view it if you give them the link
- Public – Anyone can search for the playlist and watch your curated video selections
Then click CREATE and you’ve got a playlist!
When you find another video, just follow the same procedure as above but instead of creating the playlist you will see your playlist as a choice.
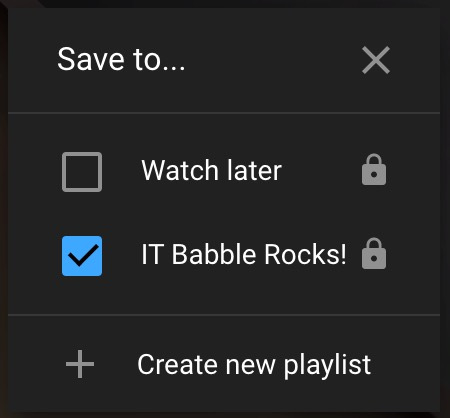
You will notice that there is no Save button. That is correct. Just click the X to close this little window and you’ll be good to go.
Step 1 – Alternative ways to add videos to your playlist
There are other ways to add videos to playlists. If you see a thumbnail of a video and you are like “Oh yeah – my class needs that one” you can add that video without having to open it up and start playing it.
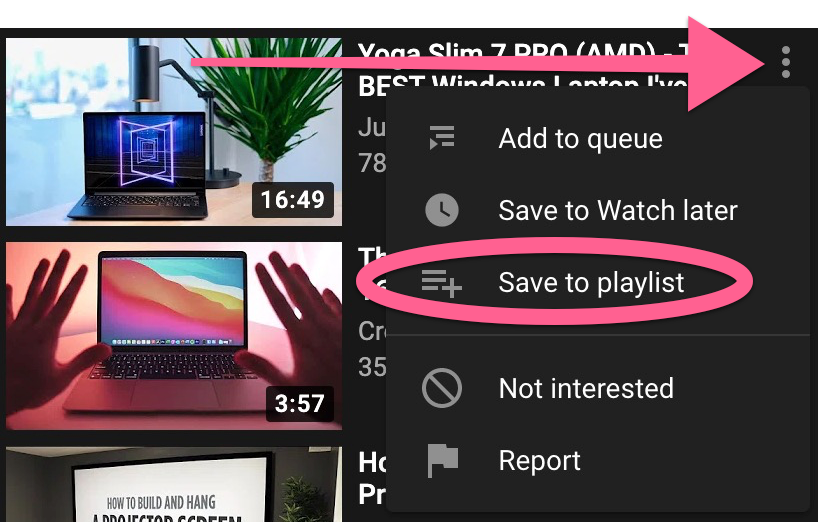
From any thumbnail, you will see three dots in the top right hand corner. Click those to bring up your options. Then select Save to playlist, select your playlist and Bob’s your uncle.
Step 2 – Where is my playlist?
Now that you’ve scoured all of YouTube and found all the perfect resources to aide your teaching you may be thinking to yourself “OK – now where is my playlist? Where does it live?”
That is an excellent question and lucky for us it is an easy answer.
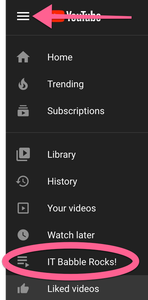
No matter where you are on YouTube you will see these three lines in the top left hand corner of the screen. Click on those a menu will slide you. You will see your playlists on that menu.
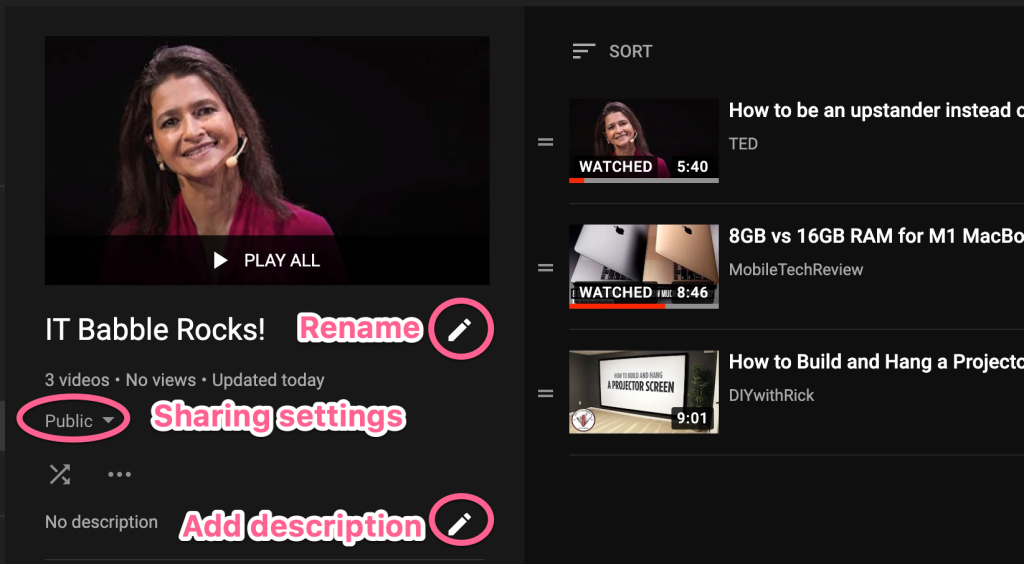
When you select your playlist, it will take you to a new place. Here you can rename your playlist, add a description (if you’d like it’s not required), change how public it is or reorder your videos.
Of course you will need the actual link to the playlist and guess what? It is right there in your address bar (URL bar, Omni bar, whatever you want to call it).
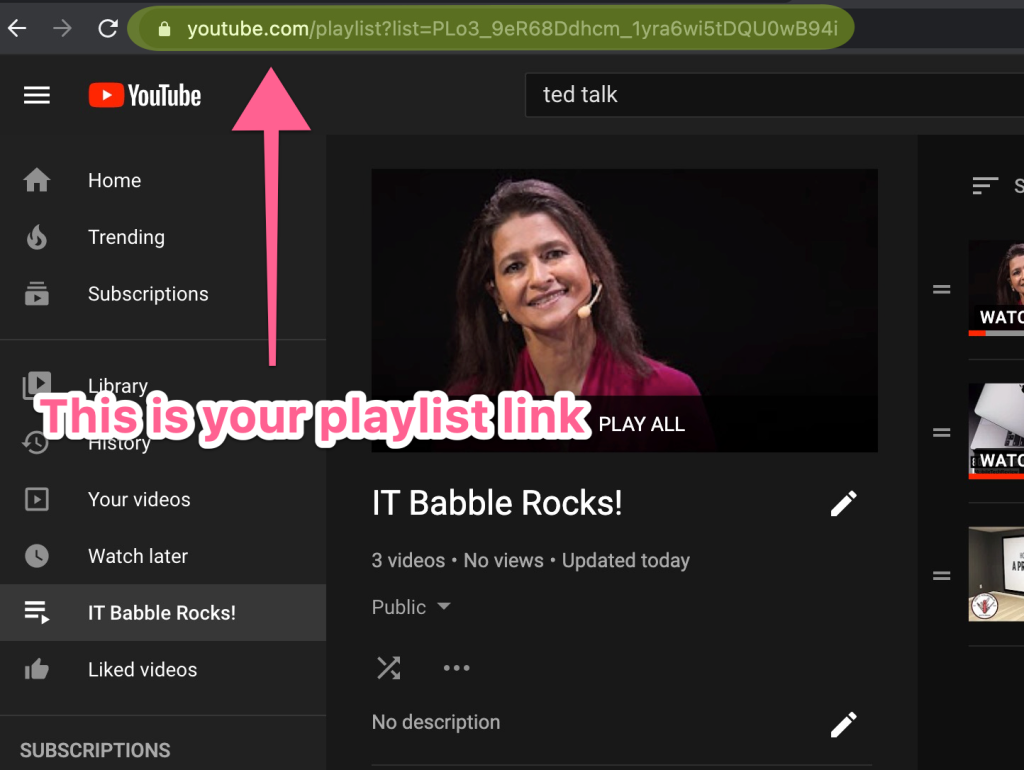
So you can take that link and drop it into Google Classroom, Canvas, Edmodo, Schoology, email, whatever you use to communicate with your students.
If you want to reorder your videos all you have to do is click and drag them to the order you want. Pretty straight forward.
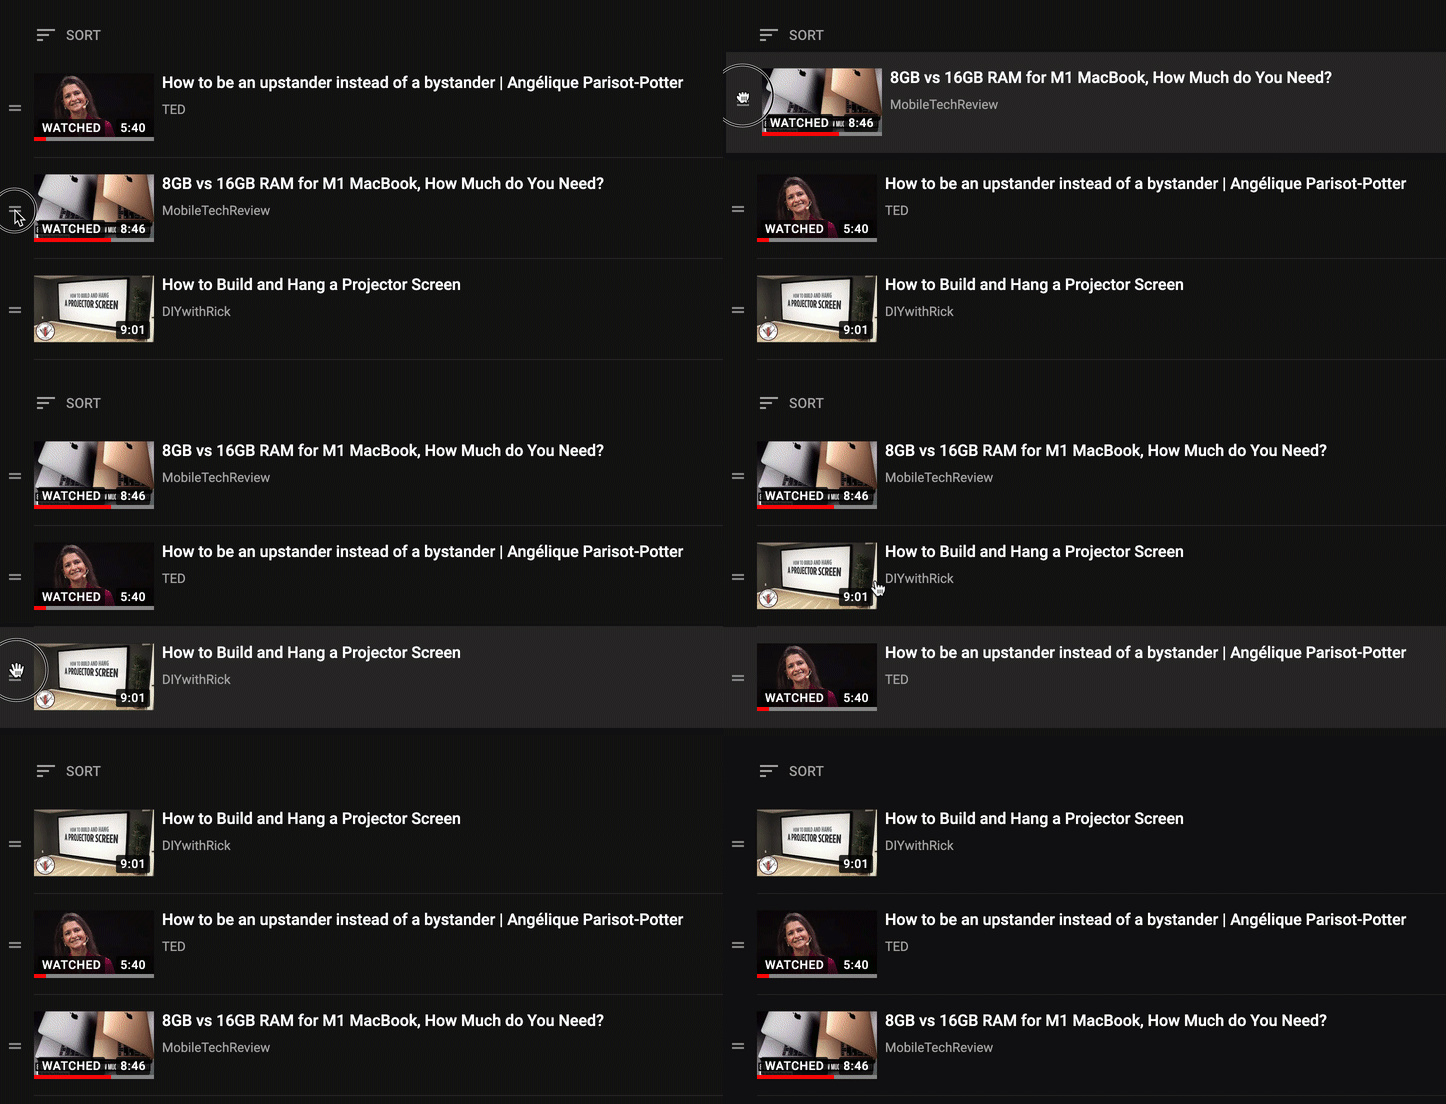
Step 3 – Playlist options
As time goes on you may want to remove some videos from your playlist. Maybe they are not relevant, maybe the creator deleted her/his channel and the video just doesn’t exist anymore. At any rate this is pretty easy to do. From your playlist you will three dots by the video (on the right hand side of the screen). Click that and you will see a bunch of options.
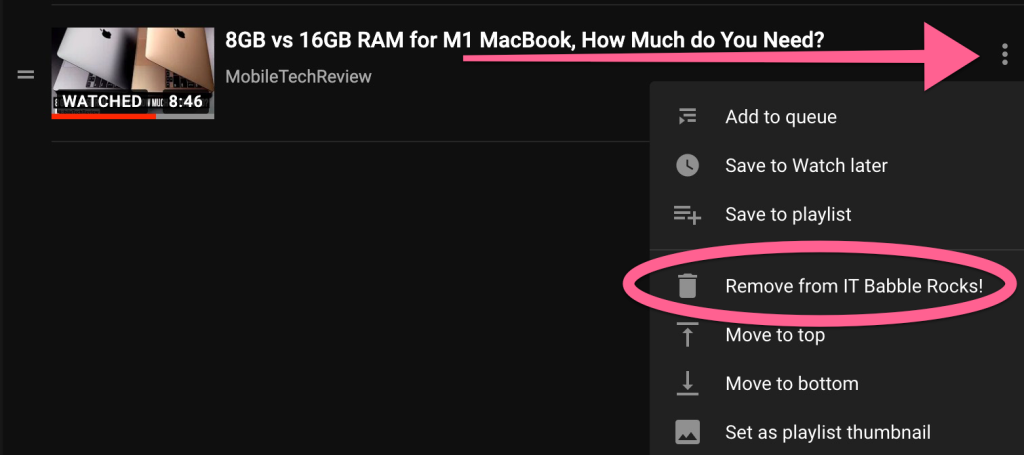
You can also add those videos to other playlists as well which makes it handy.
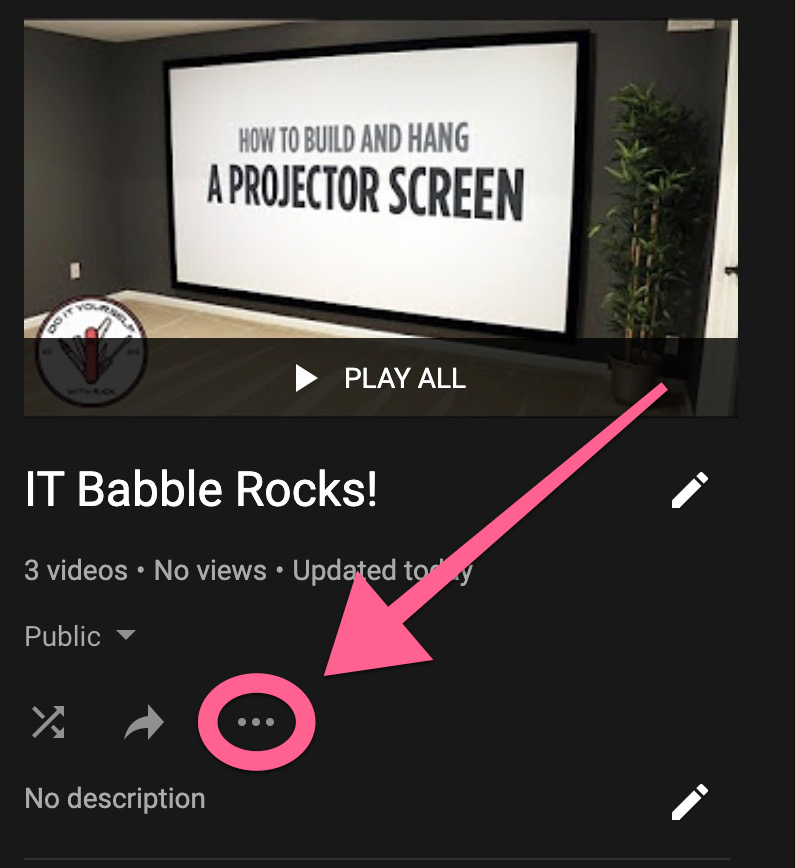
If you want to delete your playlist all together you certainly can do this too! From your playlist page you will see these three dots. They are kinda hidden near the middle of the page. Check out the image below to see where to find them.
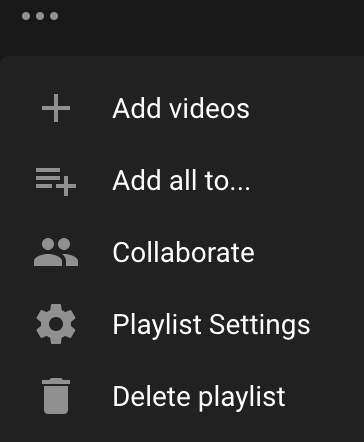
When you click those three dots here will be your options. You can do quite a bit here. You can add all the videos to another playlist, delete your playlist, add a contributor (team teaching anyone) so they can add videos to the playlist and some more options.
So there you have it!
That’s playlists in a nutshell.
Source: IT Babble Blog and Podcast
You must be logged in to post a comment.